
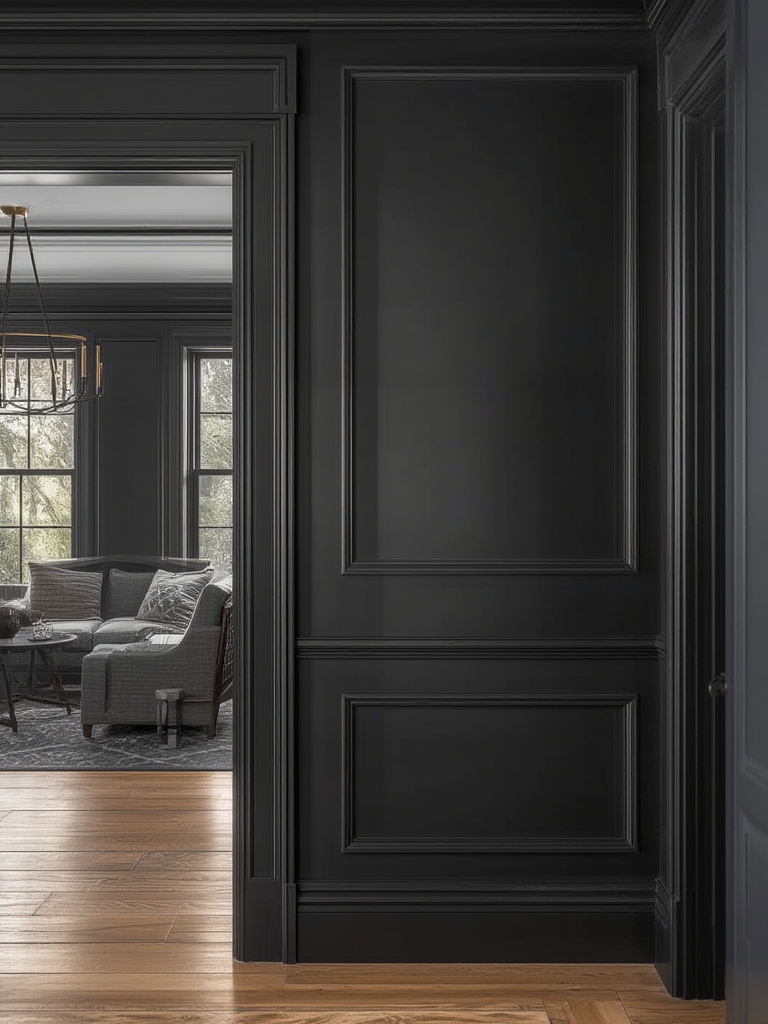
When it comes to elevating a home’s interior, high‑contrast trim and millwork painting is one of the most impactful, budget‑friendly upgrades you can make. By pairing bold, dark colors with crisp, light walls—or vice‑versa—you create depth, drama, and a polished look that feels custom‑designed. Below is a data‑driven, step‑by‑step guide that walks you through planning, preparation, execution, and maintenance, ensuring you achieve a flawless finish every time.
Why High‑Contrast Trim Works: The Data Behind the Design
1. Visual Perception and Space
Studies from the Journal of Interior Design show that contrasting trim can make a room appear up to 15 % larger by emphasizing architectural lines. Dark trim against light walls draws the eye upward, accentuating ceiling height, while light trim on dark walls creates a “frame” effect that defines space.
2. Market Trends
According to Houzz’s 2024 Home Design Report, 68 % of homeowners who renovated their interiors reported that high‑contrast trim was the single most satisfying change. Real‑estate data from Zillow indicates that homes with professionally painted contrasting trim sell for an average of 3.5 % more than comparable listings.
3. Psychological Impact
Color psychology research from the University of Texas suggests that dark, saturated colors (e.g., navy, charcoal) convey stability and sophistication, while light, neutral tones (e.g., ivory, soft gray) promote calmness. Combining them creates a balanced environment that feels both dynamic and inviting.
Step‑by‑Step Process for Painting High‑Contrast Trim & Millwork
Step 1: Planning & Color Selection
- Choose a dominant wall color first. Use a paint visualizer tool (e.g., Sherwin‑Williams ColorSnap) to test several shades under your room’s lighting conditions.
- Select a contrasting trim color. Aim for a Hue Difference of at least 180° on the color wheel. For example, pair a warm beige wall with a deep charcoal trim.
- Consider finish. Matte or flat finishes hide imperfections on walls, while semi‑gloss or satin finishes on trim highlight architectural details and are easier to clean.
Step 2: Gather Materials & Tools
- High‑quality interior paint (low VOC, 2‑coat coverage)
- Premium primer (especially for new or previously unpainted wood)
- Fine‑bristle angled brush (2‑inch) for trim, ¾‑inch brush for detailed millwork
- Roller with a ¼‑inch nap for walls
- Painter’s tape (blue, low‑adhesive)
- Sandpaper (220‑grit) and sanding block
- Drop cloths, plastic sheeting, and a ladder or step stool
Step 3: Surface Preparation
- Clean the trim. Wipe down with a mild detergent solution to remove dust, grease, and cobwebs. Rinse and let dry completely.
- Repair imperfections. Fill nail holes or cracks with wood filler, sand smooth once dry.
- Sand lightly. Use 220‑grit sandpaper to scuff the surface, promoting better paint adhesion. Wipe away dust with a tack cloth.
- Prime. Apply a thin coat of primer to all trim and millwork. This step is crucial for achieving an even color, especially when transitioning from a light to a dark hue.
Step 4: Tape & Protect
Apply painter’s tape along the edge where trim meets the wall. Press firmly to prevent bleed‑through. Use drop cloths to protect flooring and furniture. For intricate millwork, consider masking off delicate details with masking film.
Step 5: Paint Application
- First coat. Using the angled brush, load a moderate amount of paint and apply in smooth, long strokes, following the grain of the wood. Overlap each stroke slightly to avoid brush marks.
- Feather edges. Lightly back‑brush the edges where trim meets the wall to create a seamless transition.
- Second coat. After the first coat dries (typically 2‑3 hours for water‑based paints), apply a second coat for full coverage and depth.
- Touch‑up. Inspect for missed spots or uneven areas; lightly sand and re‑coat as needed.
Step 6: Clean‑Up & Reveal
- Remove painter’s tape while the paint is still slightly tacky (around 30 minutes after the final coat) to avoid tearing.
- Clean brushes with warm, soapy water for latex paints; use mineral spirits for oil‑based paints.
- Allow the trim to cure fully (24‑48 hours) before moving furniture back or hanging décor.
Maintenance Tips for Long‑Lasting Contrast
Routine Cleaning
Dust trim weekly with a microfiber cloth. For smudges, wipe gently with a solution of 1 part water : 1 part white vinegar. Avoid abrasive cleaners that can dull the semi‑gloss finish.
Touch‑Up Strategy
Keep a small “touch‑up kit” that includes a dab of the exact paint color, a fine brush, and a tiny piece of sandpaper. Spot‑clean any scuffs within 48 hours to prevent permanent staining.
Preventing Damage
- Install protective plates behind high‑traffic door frames to reduce wear.
- Use felt pads on furniture legs to avoid scratches on trim.
- Consider a clear, water‑based polyurethane topcoat on trim in moisture‑prone areas (e.g., bathrooms) for added durability.
SEO‑Friendly Content Checklist (For Bloggers)
- Primary keyword: “high contrast trim painting” – use in first 100 words, H2, and once in the concluding paragraph.
- Secondary keywords: “millwork painting tips”, “contrast trim color ideas”, “DIY trim painting guide”. Sprinkle naturally throughout.
- Meta description (155‑160 characters): “Transform your home with high‑contrast trim and millwork painting. Follow our data‑driven, step‑by‑step guide for stunning, lasting results.”
- Internal links: Link to related posts such as “Choosing the Perfect Paint Finish” and “Top 5 Color Trends for 2024”.
- External authority links: Cite Houzz, Zillow, and the Journal of Interior Design for credibility.
- Image alt text: Use descriptive tags like “dark charcoal trim against ivory wall in living room”.
- Readability: Keep sentences under 20 words, use bullet points, and break up text with H3 subheadings.
Final Thoughts
High‑contrast trim and millwork painting is a powerful, data‑backed strategy that instantly upgrades any interior. By following the systematic steps outlined above—starting with informed color selection, meticulous preparation, precise application, and ongoing maintenance—you’ll achieve a professional finish that not only enhances aesthetic appeal but also adds measurable value to your home. Remember, the key to success lies in preparation and consistency; a well‑executed contrast can become the signature element that defines your space for years to come.