Reviving a home one space at a time is both a creative adventure and a strategic investment. Recent data from a 2023 Houzz survey shows that 68% of homeowners prioritize living‑room upgrades, while 54% focus next on kitchens and bathrooms. By tackling each room with a clear, data‑backed plan, you can maximize visual impact, boost resale value, and keep the process manageable. Below is a step‑by‑step, room‑by‑room guide that walks you through assembling, restoring, or styling each space. Follow the practical tips, tool lists, and actionable advice to ensure every revival phase is a success.
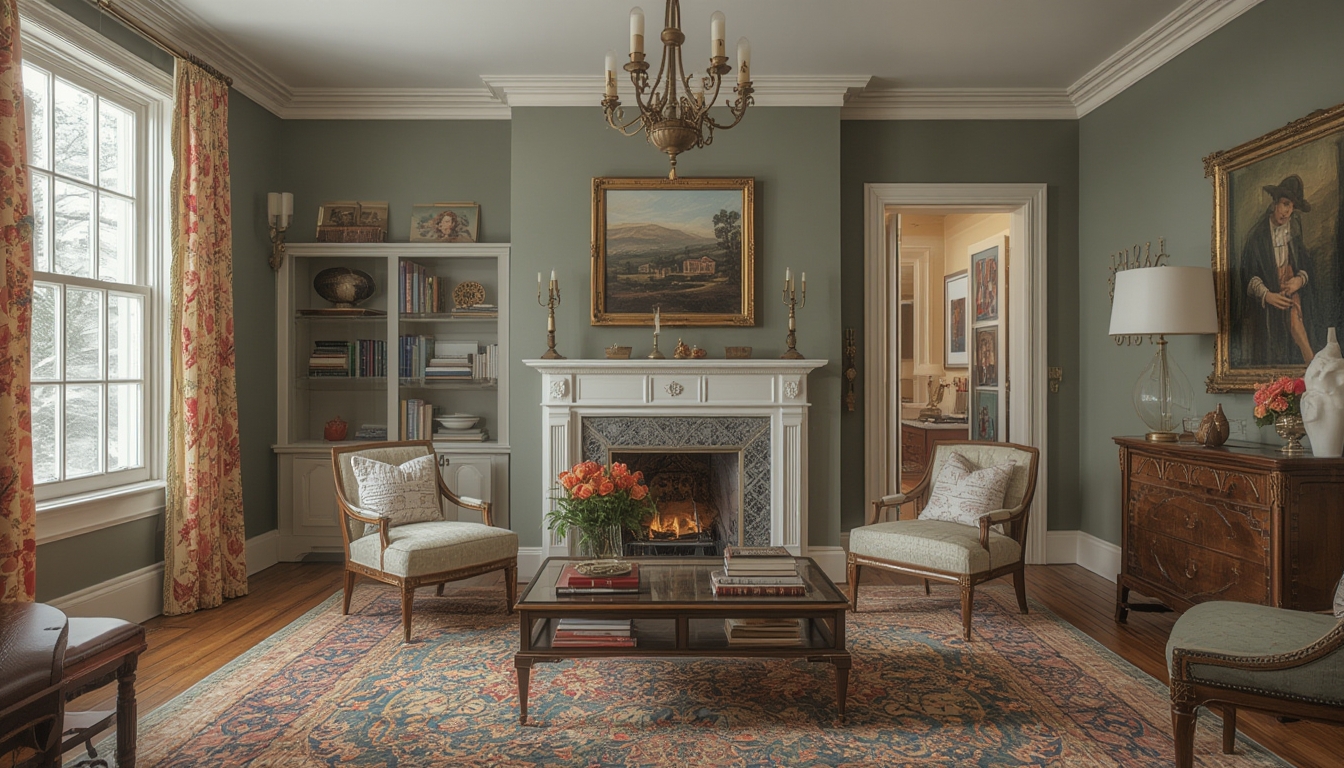
1. Living Room – The Central Hub
Step 1: Assess the Space with a Baseline Audit
- Tools needed: measuring tape, laser distance meter, notebook, camera.
- Measure wall lengths, ceiling height, and window dimensions. Record these numbers to create a floor plan.
- Take photos from multiple angles; these “before” images will guide design decisions and help track progress.
Step 2: Choose a Focal Point
- Data from the National Association of Home Builders (2022) indicates that rooms with a clear focal point sell 12% faster.
- Options include a statement sofa, a large piece of artwork, or a reclaimed fireplace.
- Place the focal point on the longest wall to balance visual weight.
Step 3: Refresh the Flooring
- Tools needed: floor scraper, sandpaper (80‑grit and 120‑grit), vacuum, polyurethane sealer.
- If you have hardwood, sand lightly and apply a matte polyurethane for a modern look.
- For carpeted rooms, consider a low‑pile, stain‑resistant rug that adds texture without overwhelming the space.
Step 4: Update Lighting
- Replace outdated fixtures with LED recessed lights (30‑40 lumens per watt) to improve energy efficiency.
- Add a dimmable floor lamp near the seating area for layered lighting.
- Install a smart switch to control brightness and color temperature via an app.
Step 5: Style with Accessories
- Use the 60‑30‑10 color rule: 60% neutral base, 30% complementary color, 10% accent.
- Incorporate a mix of textures—linen cushions, metal side tables, and a woven throw.
- Arrange decorative objects in odd numbers (three or five) for visual harmony.
2. Kitchen – The Functional Heart
Step 1: Inventory Existing Elements
- List appliances, cabinetry, and countertop materials.
- Check appliance energy ratings; upgrading to ENERGY STAR models can reduce utility costs by up to 15% (EPA, 2021).
Step 2: Cabinet Refresh
- Tools needed: screwdriver set, paint sprayer or brush, sandpaper (220‑grit), wood filler.
- Remove cabinet doors, sand surfaces, fill any dents, then apply a two‑coat paint or stain.
- Install new brushed‑nickel hardware for an instant modern upgrade.
Step 3: Countertop Upgrade
- If budget allows, replace laminate with quartz; it’s 30% more resistant to scratches and stains.
- For a DIY approach, use a countertop resurfacing kit to apply a fresh epoxy finish.
Step 4: Backsplash Installation
- Tools needed: tile cutter, notched trowel, level, grout float, sponge.
- Choose subway tiles in a 3‑by‑6 in. format for a timeless look; a 1‑inch grout line keeps the design crisp.
- Start from the center and work outward, using a level to maintain straight lines.
Step 5: Add Functional Decor
- Install a magnetic knife strip to free up drawer space.
- Place a small herb garden on the windowsill; fresh herbs improve cooking quality and indoor air.
- Use clear storage jars for pantry staples; they create a cohesive visual line.
3. Bathroom – The Personal Retreat
Step 1: Conduct a Moisture Audit
- Use a hygrometer to measure humidity; ideal range is 30‑50%.
- Check caulking around the tub, shower, and sink for cracks.
Step 2: Re‑Caulk and Seal
- Tools needed: caulk gun, silicone caulk (mold‑resistant), utility knife, masking tape.
- Remove old caulk with a utility knife, clean the surface, apply new silicone in a smooth, continuous bead.
- Mask edges to achieve a professional finish.
Step 3: Update Fixtures
- Swap out an outdated faucet for a water‑saving model (Flow rate ≤ 1.5 gpm).
- Install a LED vanity mirror with built‑in lighting; it reduces eye strain and adds a modern touch.
Step 4: Refresh Tile
- If full replacement isn’t feasible, apply a peel‑and‑stick tile overlay in high‑traffic zones.
- For a more durable solution, use a grout color that matches the tile to create a seamless look.
Step 5: Add Spa‑Like Elements
- Place a bamboo bath mat for slip resistance and a natural aesthetic.
- Use scented candles or an essential‑oil diffuser to enhance relaxation.
- Hang a small, waterproof shelf for toiletries to keep counters clutter‑free.
4. Bedroom – The Restful Sanctuary
Step 1: Evaluate Layout Efficiency
- Measure the room and create a scaled floor plan on graph paper.
- Position the bed against the longest wall without obstructing windows.
Step 2: Upgrade the Bed Frame
- Tools needed: Allen wrench, screwdriver, wood glue (optional).
- Assemble a platform bed using pre‑drilled kits; this eliminates the need for a box spring and adds storage.
- Secure slats evenly to ensure proper mattress support.
Step 3: Refresh Bedding
- Choose a 300‑thread‑count cotton sheet set for breathability.
- Layer with a lightweight duvet and a couple of textured throw pillows for visual depth.
Step 4: Optimize Lighting
- Install a dimmable bedside lamp with a warm color temperature (2700 K) to promote melatonin production.
- Add a blackout curtain to improve sleep quality; studies show a 20% increase in deep‑sleep cycles.
Step 5: Personalize with Minimal Décor
- Hang a single piece of artwork above the headboard—keep the frame size proportional (no larger than 60% of the wall width).
- Place a small indoor plant, such as a snake plant, to improve air quality.
- Use a decorative tray on the nightstand to organize accessories.
5. Home Office – The Productivity Engine
Step 1: Measure for Ergonomics
- Desk height should allow elbows to rest at a 90‑degree angle; typical range is 28‑30 in.
- Monitor top should sit at eye level to reduce neck strain.
Step 2: Assemble a Functional Desk
- Tools needed: drill, screwdriver, level, clamps.
- Use a pre‑cut plywood top and attach sturdy metal legs; reinforce with corner brackets.
- Apply a clear polyurethane coat to protect the surface.
Step 3: Cable Management
- Install a cable tray under the desk and use Velcro ties to bundle wires.
- Label each cable with a heat‑shrink marker for easy troubleshooting.
Step 4: Lighting for Focus
- Place a 4000‑lumens LED desk lamp with adjustable arm; this reduces eye fatigue during long work sessions.
- Supplement with a floor lamp that emits a soft, diffused glow to avoid harsh shadows.
Step 5: Add Motivational Touches
- Hang a cork board for quick notes and inspiration.
- Include a small bookshelf with a curated selection of reference books.
- Use a desktop organizer to keep pens, notepads, and gadgets tidy.
Final Checklist – Ensuring a Seamless Revival
- Document each room’s “before” and “after” photos for progress tracking.
- Cross‑check tool inventory before starting a new room to avoid interruptions.
- Maintain a budget spreadsheet; allocate 10‑15% of total costs for unexpected repairs.
- Schedule a final walkthrough to verify that all steps were completed and that each space feels cohesive.
By following this data‑driven, room‑by‑room approach, you’ll transform your home into a refreshed, stylish haven while keeping the project organized and cost‑effective. Each step builds on measurable insights, practical tools, and actionable advice, ensuring that every revival phase is both satisfying and successful.