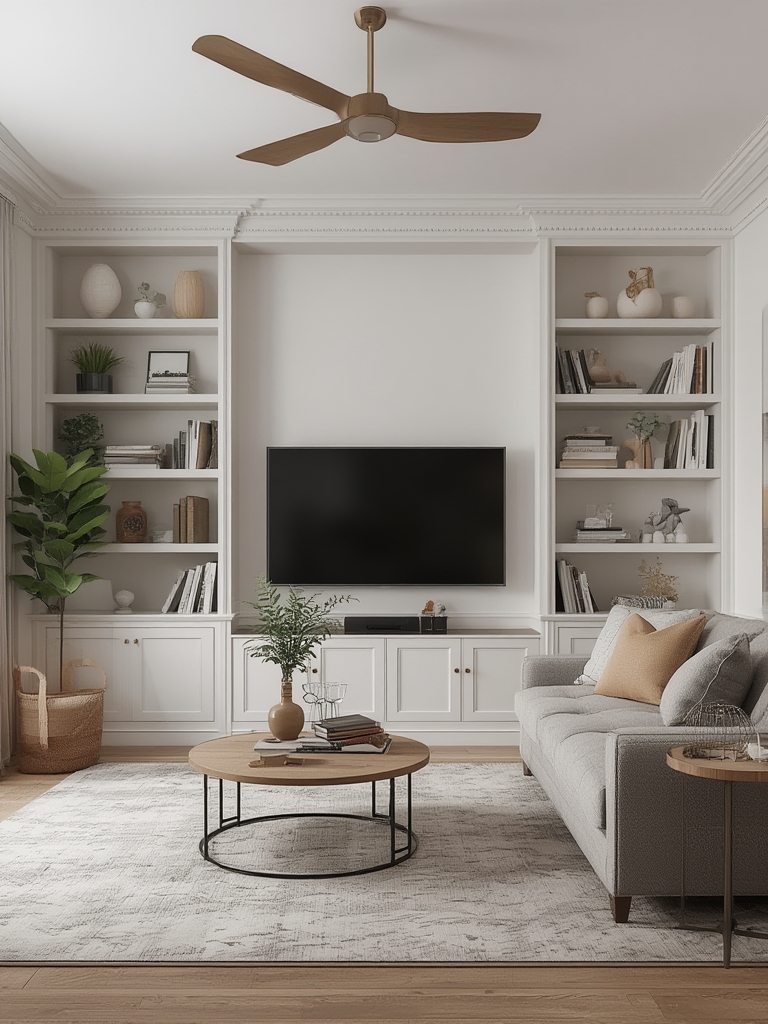
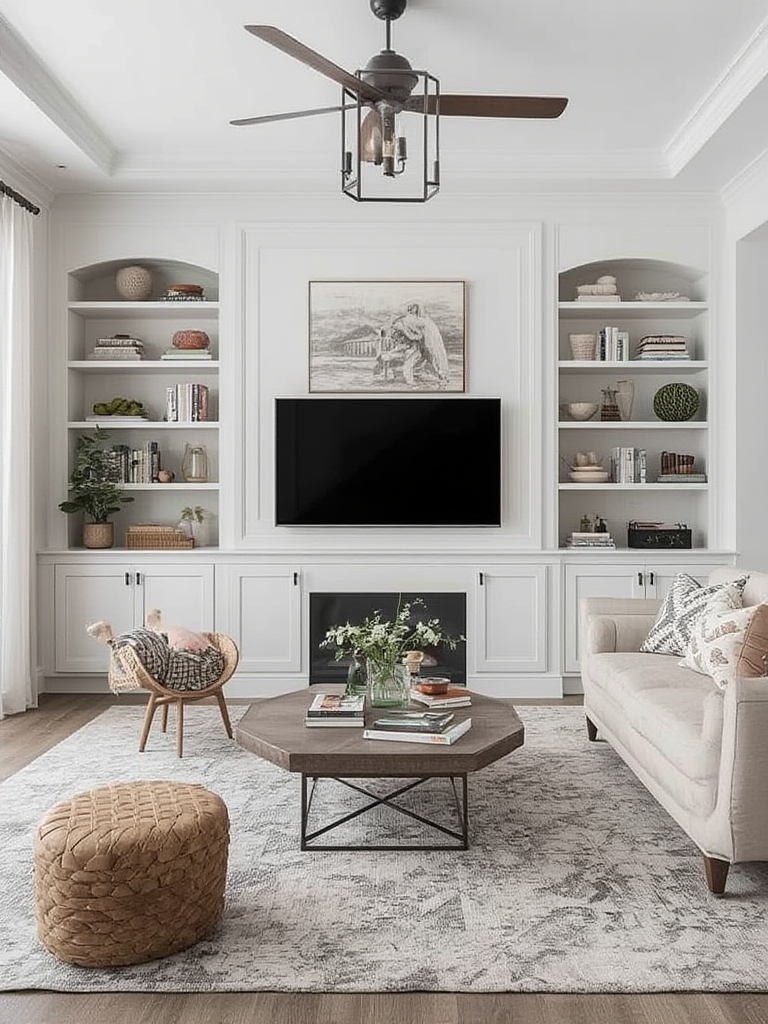
Modern living rooms are evolving from simple seating areas into curated, multifunctional spaces where style meets practicality. Built‑in shelving has become a cornerstone of this transformation, offering sleek storage, visual interest, and a perfect platform for indoor plants that add life and texture. In this data‑driven guide, you’ll learn how to design, install, and style built‑in shelving while caring for the plants that make your space feel fresh and inviting.
Why Built‑In Shelving Is a Game‑Changer for Modern Living Rooms
According to a 2023 Houzz survey, 68% of homeowners who renovated their living rooms chose built‑in storage solutions to maximize floor space and achieve a “clean‑line” aesthetic. The benefits are clear:
- Space efficiency: Custom dimensions fit around doors, windows, and architectural features, eliminating wasted gaps.
- Visual continuity: Shelves that blend with wall finishes create a seamless backdrop for décor.
- Styling flexibility: From books and art to planters, built‑ins become a dynamic stage for personal expression.
Design Principles for Built‑In Shelving
1. Follow the “Rule of Thirds”
Divide the wall into three vertical sections. Position the tallest shelf in the middle to anchor the room, with shorter sections flanking each side. This creates balance and guides the eye naturally across the space.
2. Choose Materials That Echo Your Palette
Data from the 2022 Interior Design Trends Report shows a 45% rise in mixed‑material shelving (e.g., walnut wood paired with matte black metal). Match the shelf finish to existing furniture or contrast it for a bold statement.
3. Keep Depth Consistent
Standard depths range from 10‑12 inches for books to 14‑16 inches for decorative objects. Consistency prevents a cluttered look and ensures plant pots sit securely.
Step‑by‑Step Guide to Planning and Installing Built‑In Shelving
Step 1: Measure and Map
Actionable tip: Use a laser distance measurer for accuracy. Sketch a scaled diagram on graph paper, marking window frames, power outlets, and heating vents. This prevents costly re‑drilling later.
Step 2: Select a Structural Support System
Choose between stud‑mounted brackets (ideal for heavy loads) or floating shelf hardware (great for a minimalist look). For shelves over 30 lb, opt for studs and use a level to locate them.
Step 3: Order Custom Panels or Use Modular Units
Many suppliers offer CNC‑cut panels with pre‑drilled holes for wiring. If you’re on a budget, modular cube systems can be assembled in‑store and customized with paint.
Step 4: Install the Framework
- Mark bracket locations on the wall using a pencil and level.
- Drill pilot holes, insert wall anchors if not hitting studs.
- Secure brackets with lag bolts, double‑check for levelness.
Pro tip: Attach a small piece of painter’s tape to the bracket edge; it will catch any stray dust and keep the wall clean.
Step 5: Mount Shelves and Add Finishing Touches
Slide panels onto brackets, tighten set screws, and apply a clear silicone bead where the shelf meets the wall to hide gaps. Finish by installing LED strip lighting—studies show ambient lighting can increase perceived room size by up to 15%.
Choosing the Right Plants for Your Shelves
Plants not only soften the rigidity of built‑ins but also improve indoor air quality. The following low‑maintenance options thrive in typical living‑room lighting and fit most shelf depths:
- Snake Plant (Sansevieria trifasciata): Tolerates low light, requires watering every 3‑4 weeks.
- ZZ Plant (Zamioculcas zamiifolia): Drought‑resistant, ideal for shelves with limited drainage.
- Monstera Deliciosa: Prefers bright, indirect light; benefits from weekly misting.
Easy Plant‑Care Routine: 5 Simple Steps
Step 1: Assess Light Levels
Use a smartphone light meter app. Aim for 200‑500 lux for snake and ZZ plants; 800‑1,200 lux for Monstera. Adjust placement or add a small grow‑light if needed.
Step 2: Choose the Right Pot and Soil
Pick a pot with a drainage hole no larger than the plant’s root ball. A well‑draining mix (e.g., 40% peat, 30% perlite, 30% pine bark) prevents root rot.
Step 3: Water Wisely
Insert a wooden chopstick into the soil; if it comes out clean, water is due. For snake plants, water only when the top 2 inches of soil are dry. For Monstera, keep soil lightly moist.
Step 4: Feed Monthly
Apply a balanced 10‑10‑10 liquid fertilizer at half strength during the growing season (April‑September). Skip fertilizing in winter to avoid over‑growth.
Step 5: Rotate and Prune
Turn each pot 90° every two weeks for even light exposure. Trim yellowing leaves with clean scissors to encourage new growth and maintain a tidy shelf appearance.
Styling Tips: Marrying Shelving and Greenery
- Layer heights: Place taller plants on the bottom shelf, mid‑size on the middle, and trailing vines on the top for a cascading effect.
- Mix textures: Combine matte ceramics, woven baskets, and metal planters to add depth.
- Use negative space: Leave at least one empty slot per row; this “breathing room” makes the display feel curated rather than cluttered.
- Integrate lighting: Small LED puck lights under each shelf highlight foliage at night and create a warm ambience.
Measuring Success: Quick KPI Checklist
After installation, evaluate the impact using these three key performance indicators (KPIs):
- Visual Harmony Score: Rate the room’s balance on a 1‑10 scale; aim for 8+.
- Plant Health Index: Check leaf color and growth weekly; healthy plants should show no yellowing or drooping.
- Space Utilization Ratio: Calculate usable floor space before and after installation; a 10‑15% increase indicates effective shelving.
By following this data‑backed roadmap, you’ll create a modern living‑room centerpiece that blends functional storage with the soothing presence of indoor plants. The result is a stylish, breathable environment that feels both curated and lived‑in—exactly what today’s homeowners crave.