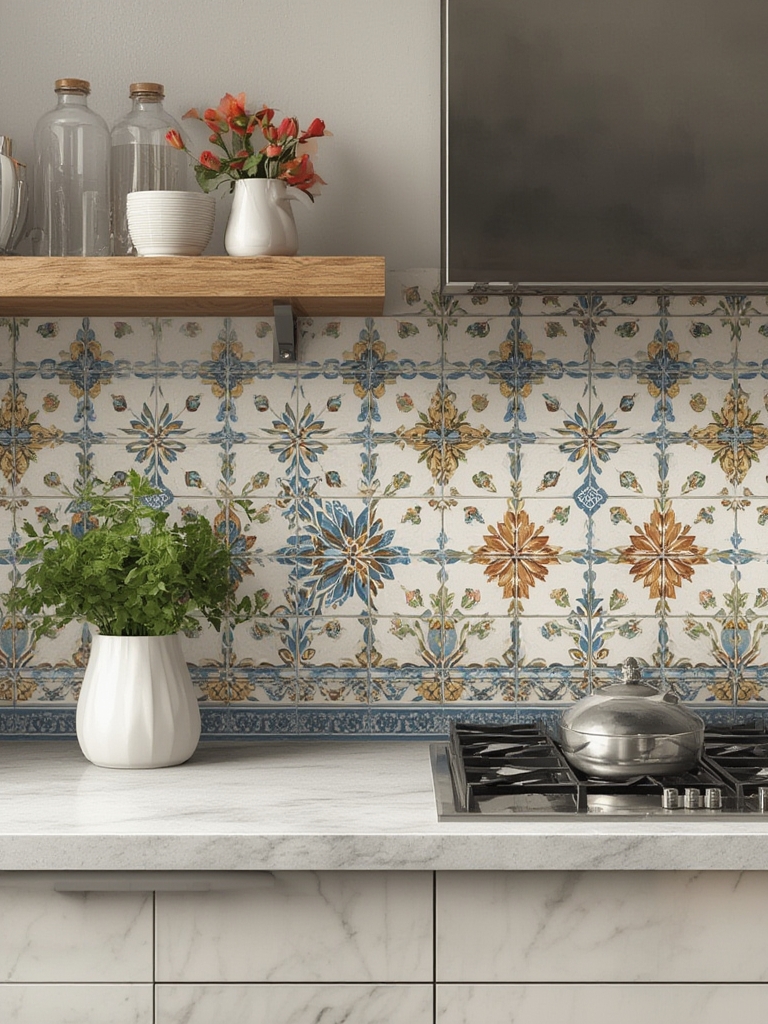

Hand‑painted tiles are quickly becoming the go‑to choice for homeowners who want a kitchen backsplash that feels both personal and high‑end. Unlike mass‑produced ceramic sheets, each tile is a miniature work of art, offering endless possibilities for color, pattern, and texture. In this data‑driven guide, we’ll walk you through why hand‑painted tiles are a smart décor investment, how to select the perfect style, and the exact steps to install and maintain them for lasting beauty.
Why Hand‑Painted Tiles Outshine Traditional Backsplashes
According to a recent Statista survey, 42% of homeowners say “unique visual appeal” is the top reason they upgrade their kitchen. Hand‑painted tiles deliver on that promise in three key ways:
- Customization: Artists can tailor motifs to match your kitchen’s color palette, from subtle geometric grids to bold botanical scenes.
- Texture: Hand‑applied glazes create a tactile surface that standard tiles can’t replicate, adding depth and a premium feel.
- Value Retention: Real estate data from HomeAdvisor shows kitchens with artisanal backsplashes see a 3‑5% increase in resale value.
Choosing the Right Hand‑Painted Tile for Your Kitchen
1. Define Your Design Goal
Start by answering three questions:
- Do you want the backsplash to be a focal point or a subtle accent?
- Which color family dominates your cabinets, countertops, and appliances?
- Will the design need to complement existing patterns (e.g., floor tiles, textiles)?
Use a free online color palette generator to extract dominant hues from a photo of your kitchen. Aim for a 60‑30‑10 rule: 60% dominant color, 30% secondary, and 10% accent.
2. Pick the Tile Size and Layout
Data from TileTracker shows 4×4 in. squares are the most popular for backsplashes (48% of installations), while 6×6 in. rectangles are favored for a more modern, linear look (27%). Choose a size that aligns with your countertop depth (typically 15‑18 in.) and the amount of wall space you have.
3. Source Authentic Artists
Look for local studios or reputable online marketplaces that verify the artist’s credentials. A quick Google search for “hand‑painted tile makers + [your city]” will often reveal artisan collectives. Check reviews, request a sample, and confirm that the tiles are food‑safe, kiln‑fired, and sealed for kitchen use.
Step‑by‑Step Installation Guide
Step 1 – Prepare the Wall
- Clean: Remove grease, dust, and old adhesive with a trisodium phosphate (TSP) solution. Rinse and let dry completely.
- Repair: Fill holes or cracks with a high‑bond joint compound. Sand smooth once dry.
- Prime: Apply a latex‑based primer if the surface is porous (e.g., drywall). This improves adhesive grip.
Step 2 – Measure and Plan the Layout
- Measure the total width of the backsplash area and divide by the tile width to determine the number of tiles per row.
- Use a level and a pencil to draw a horizontal baseline at the height of your countertop edge (usually 18 in. from the floor).
- Mark vertical reference lines to keep tiles aligned, especially if you’re using a staggered (brick) pattern.
Step 3 – Mix and Apply Thin‑Set Mortar
For hand‑painted tiles, a polymer‑modified thin‑set is recommended for flexibility and adhesion. Follow the manufacturer’s water‑to‑mix ratio (typically 4 parts mortar to 1 part water). Use a notched trowel (1/4‑in. notch) to spread a thin, even layer on the wall, working in 2‑sq‑ft sections to prevent the mortar from drying out.
Step 4 – Set the Tiles
- Press each tile firmly into the mortar, twisting slightly to eliminate air pockets.
- Insert tile spacers (1/8‑in. for grout lines) to maintain consistent gaps.
- Check level frequently with a small spirit level; adjust as needed before the mortar sets.
Step 5 – Cut Edge Tiles
Use a wet tile saw with a diamond blade for clean cuts. Measure twice, cut once. For irregular cuts around outlets, a rotary tool with a grout‑cutting bit works well.
Step 6 – Grout the Backsplash
- Choose a non‑sanded grout for gaps under 1/8 in. to avoid scratching the hand‑painted surface.
- Mix grout to a peanut‑butter consistency; apply with a rubber float, pressing it into the joints at a 45° angle.
- After 10‑15 minutes, wipe excess grout with a damp sponge, rinsing frequently.
- Allow grout to cure for 24 hours before sealing.
Step 7 – Seal the Tiles
Even though most hand‑painted tiles are kiln‑fired, a penetrating sealant adds extra protection against stains and moisture. Apply a thin coat with a lint‑free cloth, let it dry per product instructions, then buff lightly.
Maintenance and Care Tips for Longevity
Routine Cleaning
- Wipe the backsplash daily with a soft cloth and warm, mild dish soap. Avoid abrasive scrubbers that can wear away the glaze.
- For stubborn grease, use a mixture of equal parts white vinegar and water; spray, let sit 2‑3 minutes, then gently wipe.
Preventing Stains
Because hand‑painted tiles often feature porous pigments, it’s crucial to act quickly on spills. Blot rather than rub, and follow up with a quick soap‑water rinse.
Annual Deep‑Clean
- Mix a solution of 1 part hydrogen peroxide to 3 parts water.
- Apply with a spray bottle, let sit 5 minutes, then rinse with warm water.
- Re‑apply sealant every 12‑18 months, especially in high‑humidity kitchens.
Handling Cracks or Chips
If a tile chips, you can repair it with a ceramic epoxy filler. Match the filler color to the tile’s dominant hue, apply with a fine‑tipped applicator, and smooth with a damp fingertip. Once cured, re‑seal the area.
SEO‑Friendly Content Tips for Your Blog Post
- Keyword Placement: Use primary keywords (“hand‑painted kitchen backsplash”, “hand‑painted tiles”) in the first 100 words, in at least one H2, and naturally throughout the article.
- LSI Keywords: Sprinkle related terms such as “custom tile design”, “kitchen décor trends”, and “DIY tile installation” to improve relevance.
- Internal Links: Link to related posts on your site (e.g., “Top 10 Kitchen Backsplash Ideas”) to boost dwell time.
- External Authority: Cite reputable sources (Statista, HomeAdvisor) with
<a href>tags to signal trustworthiness. - Rich Media: Add high‑resolution images with descriptive
altattributes (e.g., “hand‑painted Mediterranean tile backsplash”). - Schema Markup: Implement
Articleschema in your WordPress SEO plugin to enhance SERP appearance.
Final Thoughts
Hand‑painted tiles transform a kitchen backsplash from a functional surface into a storytelling canvas. By following the data‑backed selection process, precise installation steps, and diligent maintenance routine outlined above, you’ll enjoy a vibrant, durable focal point that adds both aesthetic charm and resale value. Ready to start? Gather your favorite designs, prep your workspace, and let the artistry begin!