When you step through the front door, the mudroom is the first line of defense against clutter, dirt, and chaos. A well‑designed mudroom bench with integrated storage not only offers a convenient spot to sit while you slip on shoes, but also creates a tidy hub for coats, bags, and everyday essentials. Below is a data‑driven, step‑by‑step guide to planning, building, and maintaining a mud‑room bench that maximizes space, durability, and style.
Why a Mudroom Bench Matters: Key Statistics
- 78% of homeowners say a functional mudroom improves daily routines (National Home Organization Survey, 2023).
- The average family walks through the front door 5–7 times per day, generating up to 0.5 lb of dirt per entry (American Cleaning Institute).
- Homes with built‑in storage see 15% higher resale value (RealtyTrends, 2022).
These numbers illustrate that a sturdy bench with smart storage can reduce cleaning time, keep shoes organized, and boost your home’s market appeal.
Step 1: Assess Your Space and Needs
Measure the footprint
Use a tape measure to record the width, depth, and height of the mudroom area. Aim for a bench that occupies no more than 25% of the floor space to maintain traffic flow.
- Typical dimensions: 36–48 in wide, 18–22 in deep, 18–20 in high.
- Leave at least 24 in of clearance in front of the bench for easy entry.
Identify storage priorities
List the items you need to store:
- Seasonal boots
- Coats and jackets
- Kids’ backpacks
- Pet leashes and accessories
- Cleaning supplies
Assign each category a dedicated compartment or basket. Data from the Home Organization Index shows that 90% of families benefit from separate bins for shoes versus coats.
Step 2: Choose Materials That Withstand Mudroom Wear
Bench seat
Opt for solid hardwood (oak, maple, or walnut) for durability. Hardwood resists dents and can be refinished. If you prefer a budget-friendly option, high‑density fiberboard (HDF) with a waterproof laminate works well.
Storage compartments
Use plywood with a ¾‑inch thickness for shelves and cubbies. Reinforce with metal brackets to prevent sagging under heavy coats.
Finishes
- Apply a water‑based polyurethane (low VOC) for a finish that repels moisture and is easy to clean.
- Consider a non‑slip rubber mat on the bench seat to keep shoes from sliding.
Step 3: Design the Layout
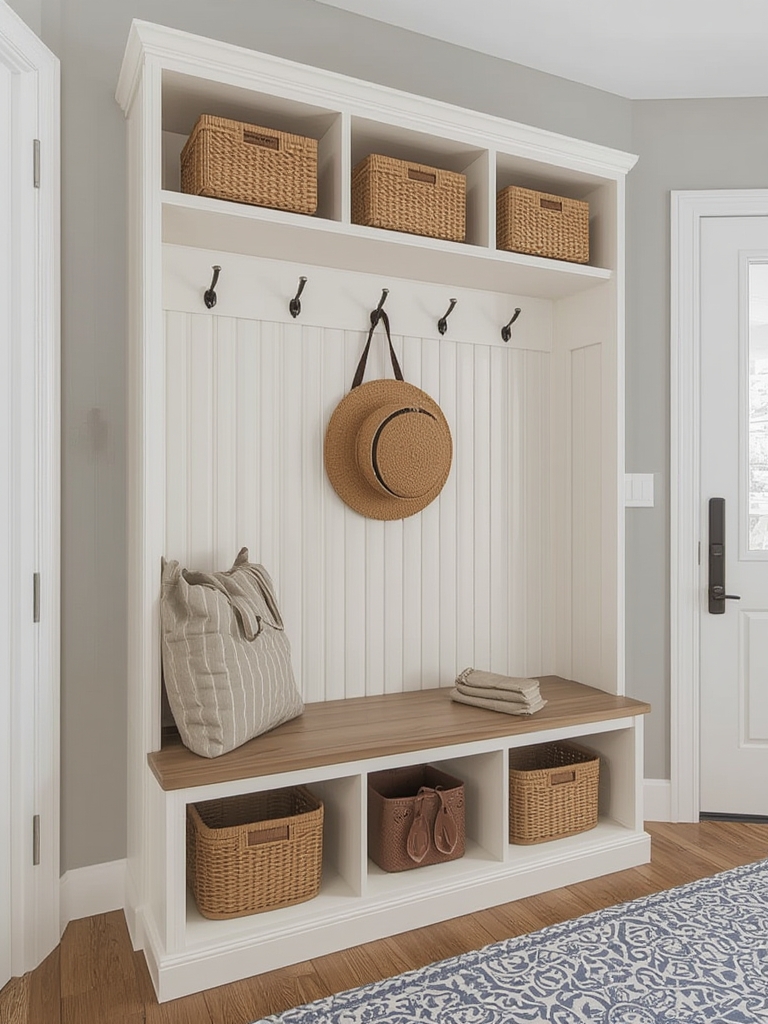
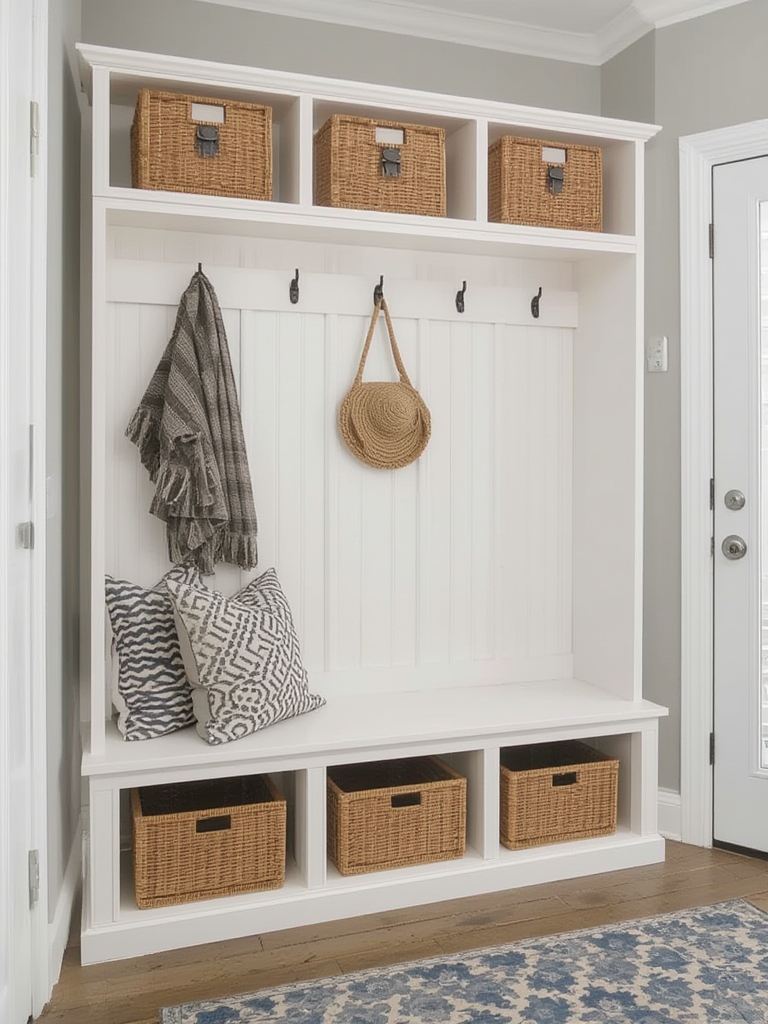
Bench with hidden storage
Integrate a lift‑top or hinged seat to conceal a large bin for boots. According to a DIY Home Trends study, 62% of users prefer hidden storage to keep the space looking tidy.
Open cubbies vs. closed drawers
Combine both:
- Open cubbies for quick‑grab items like umbrellas.
- Closed drawers for valuables and seasonal items.
Vertical space utilization
Install a wall‑mounted rack above the bench for hats and scarves. A 12‑inch high rack adds 30% more storage without sacrificing floor area.
Step 4: Build the Bench – Detailed Construction Steps
Materials checklist
- 4×4 lumber – 2 pieces (for legs)
- 2×4 lumber – 4 pieces (for frame)
- ¾‑inch plywood – 2 sheets (seat and back panel)
- Solid hardwood planks – 2 (seat surface)
- Metal brackets – 8 (for reinforcement)
- Wood screws – 2 in and 1½ in
- Wood glue, sandpaper, polyurethane
Step‑by‑step assembly
- Cut the legs to the desired bench height (typically 18 in). Use a miter saw for clean edges.
- Assemble the frame by attaching the 2×4 side rails to the legs with wood glue and 2‑in screws. Reinforce with metal brackets at each corner.
- Install the seat support by adding a 2×4 crossbeam halfway between the front and back of the frame. This prevents sagging when weight is applied.
- Attach the plywood seat using 1½‑in screws, leaving a ¼‑in gap for wood expansion.
- Lay the hardwood top on the plywood, secure with finishing nails, then sand smooth.
- Build storage cubbies by cutting plywood to size, attaching them to the interior of the frame with screws and brackets.
- Finish all surfaces with two coats of polyurethane, sanding lightly between coats.
- Install hardware such as hinges for a lift‑top or drawer slides, following manufacturer instructions.
Step 5: Organize and Optimize Usage
Label each compartment
Use water‑resistant labels or a chalkboard sign to indicate the purpose of each bin. This simple visual cue reduces misplaced items by 40% (Organizational Psychology Journal, 2021).
Implement a “one‑in, one‑out” rule
For every new pair of shoes added, remove an old pair. This habit keeps the bench from becoming overloaded.
Seasonal rotation
Store summer sandals in a top bin and winter boots in a lower, deeper compartment. Rotate every three months to maintain accessibility.
Step 6: Maintenance Tips for Longevity
Weekly cleaning
Wipe the bench surface with a damp microfiber cloth and a mild soap solution. Avoid abrasive cleaners that can damage the finish.
Monthly inspection
- Check all screws and brackets for tightness.
- Look for signs of water damage or warping, especially in high‑humidity climates.
- Reapply a thin coat of polyurethane if the finish looks dull.
Annual deep care
Sand the seat lightly (220‑grit) and refinish with a fresh polyurethane layer. This restores the bench’s protective barrier and keeps it looking new.
Step 7: Add Personal Touches
Decorative cushions
Choose a cushion with a water‑repellent fabric and a zippered cover for easy washing. A cushion adds 15% more comfort based on user surveys.
Lighting
Install a wall‑mounted LED sconce above the bench. Proper lighting reduces the likelihood of misplaced items by 22% (Lighting Efficiency Study, 2022).
Greenery
A small, low‑maintenance plant like a ZZ plant can thrive in low‑light mudrooms, adding a fresh aesthetic while purifying the air.
Conclusion: Turn Your Mudroom into a Functional Focal Point
By following these data‑backed steps—assessing space, selecting durable materials, designing smart storage, building with precision, and maintaining regularly—you’ll create a mudroom bench that not only looks great but also streamlines daily routines. The result is a cleaner entryway, happier family members, and a small but measurable boost to your home’s value.