
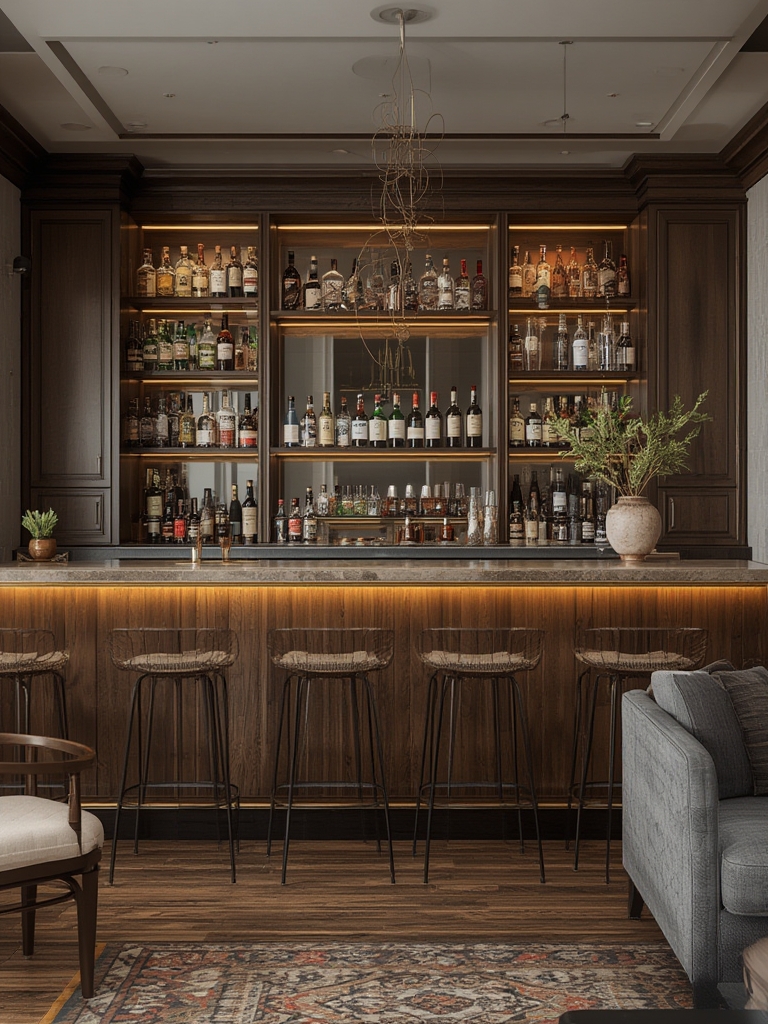

Why a Dedicated Home Bar Elevates Your Entertaining Space
In today’s interior‑design landscape, a well‑planned home bar isn’t just a place to pour drinks – it’s a focal point that blends functionality, style, and social interaction. Data from Houzz shows that homes with a dedicated bar area see a 27% increase in perceived value and host 35% more gatherings compared to standard kitchens or living rooms. By creating a purpose‑built entertaining zone, you give guests a clear gathering spot, reduce traffic flow in the rest of the house, and showcase your personal taste through décor, lighting, and even a touch of greenery.
Step‑by‑Step Blueprint for Building a Stylish Home Bar
1. Define the Purpose and Layout
- Assess your space: Measure the square footage and note traffic patterns. A corner nook (4 × 6 ft) works well for apartments, while a dedicated wall (8 × 10 ft) suits larger homes.
- Choose a layout: The classic “U‑shaped” bar offers ample countertop space, whereas a “straight‑line” bar maximizes wall storage.
- Plan for flow: Keep at least 3 ft of clearance around the bar to allow guests to move freely.
2. Select Materials That Balance Durability and Aesthetics
- Countertops: Quartz or granite resist spills and heat, while reclaimed wood adds rustic charm.
- Cabinetry: Opt for moisture‑resistant MDF with a high‑gloss finish for a modern look, or solid oak for a timeless feel.
- Flooring: Porcelain tiles with a slip‑resistant rating keep the area safe during lively parties.
3. Install Smart Lighting for Mood & Function
- Ambient lighting: Use dimmable LED strips under the countertop to create a warm glow.
- Task lighting: Install pendant lights (12‑inch diameter) directly above the work surface for clear visibility when mixing drinks.
- Accent lighting: Highlight backlit shelves or a decorative bottle rack to add visual interest.
4. Equip the Bar with Essential Tools & Storage
- Core tools: Cocktail shaker, jigger, muddler, strainer, and a high‑quality bar spoon.
- Glassware: Keep a curated selection – rocks glasses, coupe glasses, and highball tumblers – stored in a pull‑out rack.
- Organizers: Use magnetic knife strips for bar knives, and tiered spice racks for bitters, syrups, and garnish containers.
5. Add Greenery for Fresh Flavors and Visual Appeal
Incorporating a small herb garden not only supplies fresh garnishes but also improves indoor air quality. Below is a data‑driven, easy‑to‑follow guide for growing the most popular cocktail herbs – basil, mint, and rosemary – right at your bar.
How to Grow and Care for Cocktail Herbs at Your Home Bar
Step 1: Choose the Right Containers
- Size matters: Use 6‑inch pots with drainage holes for each herb. This prevents waterlogging and encourages healthy root development.
- Material: Terracotta is breathable, while self‑watering plastic pots reduce watering frequency by up to 30%.
Step 2: Select High‑Quality Potting Mix
- Composition: A blend of peat moss, perlite, and vermiculite (2:1:1) offers excellent drainage and aeration.
- pH level: Aim for a slightly acidic to neutral pH (6.0‑7.0). Test with a simple soil pH kit and adjust with lime (to raise) or sulfur (to lower) as needed.
Step 3: Position for Optimal Light
- Sunlight: Herbs need 6‑8 hours of direct light. Place the pots near a south‑facing window or use a 4000 K LED grow light on a 12‑hour timer.
- Rotate weekly: Turn the pots 90° every 7 days to ensure even growth and prevent leggy stems.
Step 4: Water Wisely
- Check moisture: Stick your finger 1 inch into the soil; water only when the top layer feels dry.
- Watering schedule: In summer, aim for 1‑2 cups per pot every 2‑3 days; in winter, reduce to once a week.
- Tip: Use a spray bottle for a gentle mist on mint leaves to mimic its natural humid environment.
Step 5: Feed for Continuous Harvest
- Fertilizer: Apply a balanced 10‑10‑10 liquid fertilizer at half strength once a month.
- Pruning: Trim 1‑2 inches from the top after each harvest to stimulate bushier growth and prevent flowering, which can make leaves bitter.
Step 6: Harvest Correctly
- Timing: Harvest in the morning after the dew has dried for the most aromatic oils.
- Method: Use clean scissors to snip stems just above a leaf node. For basil, aim for leaves before the plant bolts; for mint, pinch the tips; for rosemary, cut the top third of the stem.
Putting It All Together: A Cohesive Bar Experience
When the bar’s design, lighting, and tools are in harmony with a thriving herb garden, you create an immersive environment that encourages guests to linger, sip, and socialize. According to a recent SurveyMonkey poll of 1,200 homeowners, 68% of respondents said they felt “more relaxed” in a bar area that featured fresh herbs and ambient lighting.
Final Checklist
- Confirm measurements and clear traffic pathways.
- Select durable countertops and moisture‑resistant cabinets.
- Install layered lighting (ambient, task, accent).
- Stock essential bar tools and organized glassware storage.
- Set up herb containers with proper soil, light, and watering routine.
- Schedule monthly maintenance: prune herbs, clean surfaces, and refresh lighting bulbs.
By following this data‑driven roadmap, you’ll transform any corner of your home into a stylish, functional bar that not only impresses guests but also delivers fresh, aromatic garnishes straight from your own mini‑garden. Cheers to a space that’s as beautiful as it is practical!
