Welcome to your ultimate guide on mastering Style Spotlights—the versatile decorative pieces that can transform any room with a pop of personality. Whether you’re assembling a new spotlight, restoring a vintage find, or styling it for maximum impact, this step‑by‑step tutorial will walk you through everything you need. Grab your tools, follow the actionable advice, and watch your space come alive.
Understanding the Style Spotlight
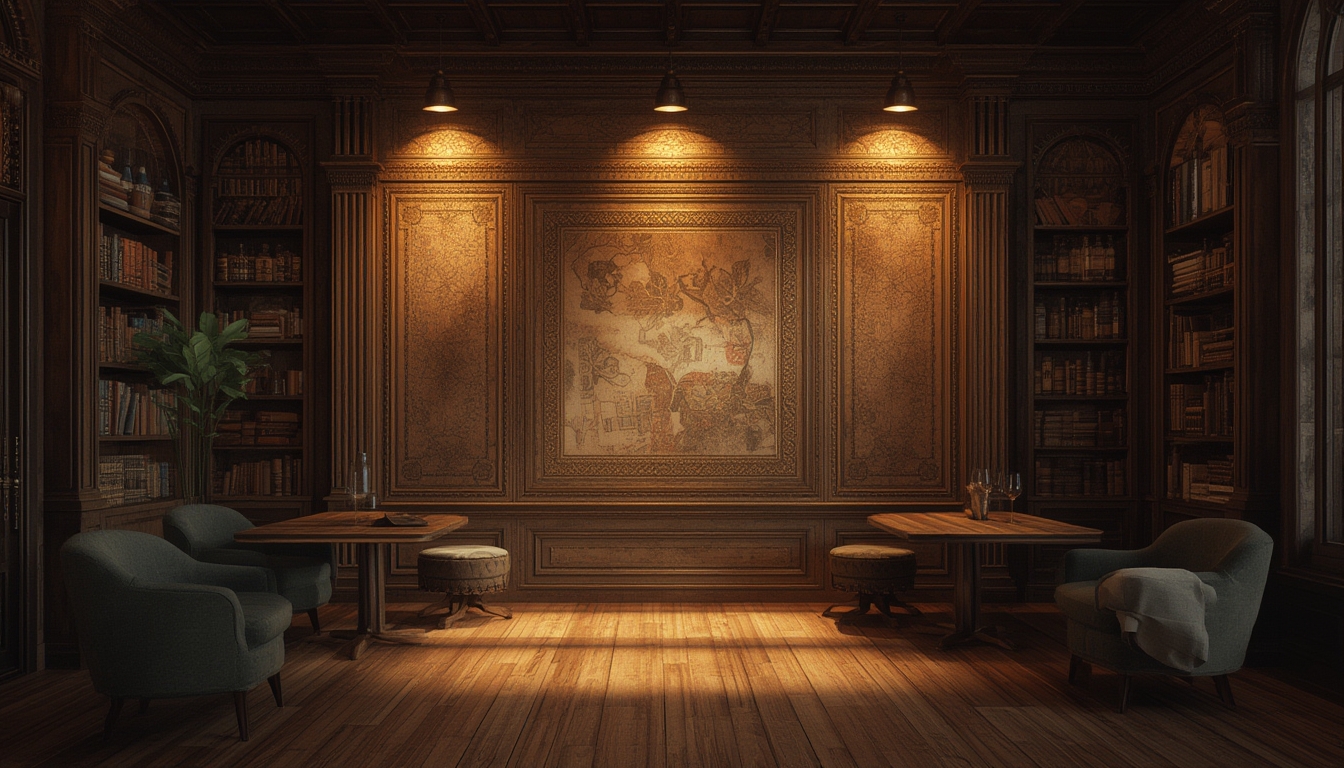
Before diving into the hands‑on process, it’s helpful to know what makes a Style Spotlight special. These fixtures typically combine a sleek base, an adjustable arm, and a focused light source that can be directed toward artwork, shelves, or architectural details. They’re designed for both function and flair, making them perfect for:
- Highlighting a statement piece of furniture.
- Creating ambient lighting in reading nooks.
- Adding a modern accent to traditional interiors.
Gathering Your Tools and Materials
Having the right tools on hand will keep the process smooth and prevent unnecessary trips to the hardware store. Below is a concise checklist:
- Phillips and flat‑head screwdrivers – for securing brackets and bulbs.
- Adjustable wrench – to tighten nuts on the base.
- Level – ensures the spotlight sits perfectly straight.
- Wire stripper/cutter – for any electrical connections (if the spotlight is hard‑wired).
- Voltage tester – safety first; confirm power is off.
- Soft cloth & mild cleaner – for dust removal during restoration.
- Replacement bulbs – LED or incandescent, depending on your preference.
Step‑by‑Step Assembly
1. Unbox and Inspect
Lay out all components on a clean surface. Verify that you have the base, arm, head, mounting hardware, and any included instructions. Check for any visible damage; if you spot dents or missing screws, contact the seller before proceeding.
2. Prepare the Mounting Surface
Choose a sturdy spot on the wall or ceiling where the spotlight will be most effective. Use a stud finder to locate a solid anchor point. Mark the drilling locations with a pencil, ensuring the marks are level.
Tip: If you’re mounting on drywall without a stud, use heavy‑duty wall anchors to guarantee stability.
3. Drill Pilot Holes
Using a drill bit slightly smaller than your mounting screws, create pilot holes at the marked spots. This prevents the wall from cracking and makes screw insertion easier.
Actionable advice: Keep the drill perpendicular to the wall; a slight angle can cause the anchor to sit unevenly.
4. Attach the Base
Secure the base plate with the provided screws, tightening them with a screwdriver or wrench. Double‑check that the base is flush against the wall and does not wobble.
5. Connect the Arm
Slide the arm into the base’s mounting bracket. Most Style Spotlights feature a quick‑lock mechanism—push the arm in, then rotate the locking knob clockwise until it clicks.
Tip: Adjust the arm’s angle now to a neutral position; you’ll fine‑tune it later when positioning the light.
6. Install the Light Head
Attach the head to the end of the arm. Align the screw holes, then secure with the small screws provided. If the head is swivel‑type, ensure the swivel joint moves freely before tightening fully.
7. Wire the Fixture (for Hard‑Wired Models)
1. Turn off power at the circuit breaker.
2. Use a voltage tester to confirm the wires are dead.
3. Strip about ½ inch of insulation from each wire.
4. Connect the black (hot) wire to the fixture’s black wire, the white (neutral) to the fixture’s white wire, and the green or bare copper (ground) to the fixture’s ground screw.
5. Secure each connection with wire nuts and wrap with electrical tape for added safety.
Safety note: If you’re uncomfortable with electrical work, hire a licensed electrician.
8. Insert the Bulb
Choose a bulb that matches the fixture’s wattage rating. Screw it in clockwise until snug. For LED bulbs, consider a color temperature of 2700K–3000K for a warm, inviting glow.
9. Test the Spotlight
Restore power at the breaker and flip the switch. Verify that the light turns on and that the head can be angled without resistance. If the bulb flickers, double‑check the socket and connections.
Restoring a Vintage Style Spotlight
1. Clean the Exterior
Dust off surface grime with a soft cloth. For stubborn stains, dampen the cloth with a mixture of mild dish soap and water. Avoid abrasive cleaners that could scratch the finish.
2. Polish Metal Parts
Apply a small amount of metal polish to a clean microfiber cloth. Gently rub the metal components—brackets, arm, and base—following the grain of the metal. Buff until you achieve a subtle shine.
3. Re‑wire If Needed
Older spotlights may have frayed cords or outdated wiring. Replace the cord with a new, appropriately rated extension cord. Follow the same wiring steps outlined in the assembly section, ensuring all connections are tight and secure.
4. Replace the Bulb
Vintage fixtures often use incandescent bulbs, but swapping to LED can preserve the look while reducing heat and energy consumption. Choose an LED with a similar shape (e.g., A‑type or globe) to maintain the aesthetic.
5. Re‑assemble and Test
After cleaning and rewiring, reattach the head and arm, then test the light as described earlier. A fully restored spotlight should emit a consistent, warm glow that highlights its classic design.
Styling Your Style Spotlight for Maximum Impact
1. Choose the Right Placement
Think about the focal point you want to accentuate. Common placements include:
- Above a gallery wall to draw attention to artwork.
- Beside a reading chair for task lighting.
- In a corner to add depth and visual interest.
Actionable tip: Use a piece of painter’s tape on the floor to mark the spotlight’s projected beam area. Adjust the arm until the beam aligns perfectly with your chosen feature.
2. Adjust the Beam Angle
Start with a wide angle to gauge coverage, then narrow it to focus on the target. Most spotlights have a dial or lever for beam width—experiment until you achieve a soft, yet defined, highlight.
3. Layer Lighting
Combine the Style Spotlight with ambient lighting (e.g., recessed lights) and task lighting (e.g., desk lamps) for a balanced look. This layering prevents harsh shadows and creates a welcoming atmosphere.
4. Add Decorative Elements
Consider attaching a small decorative shade or a colored gel to the bulb for a custom hue. This is especially effective in rooms with a bold color palette, as it ties the spotlight into the overall design scheme.
5. Maintain Consistency
When using multiple spotlights, keep the height, angle, and bulb type consistent. This uniformity creates a cohesive visual rhythm throughout the space.
Final Checklist for a Successful Style Spotlight Installation
- All tools and materials gathered before starting.
- Mounting surface prepared and anchored securely.
- Electrical safety verified (power off, voltage tested).
- Bulb type and wattage matched to fixture specifications.
- Arm and head positioned for optimal lighting effect.
- Final test completed—light on, beam aligned, no flicker.
- Cleaned and polished exterior for a polished finish.
By following these detailed steps, you’ll not only assemble or restore your Style Spotlight with confidence but also style it in a way that elevates the entire room. Remember, the key to a striking lighting design lies in thoughtful placement, precise adjustments, and a touch of personal flair. Happy lighting!