Reviving each room in your home doesn’t have to be a daunting project. By breaking the process down into manageable, data‑backed steps, you can transform spaces efficiently while staying within budget. Below is a room‑by‑room guide that walks you through assembling, restoring, or styling key pieces, complete with the tools you’ll need, actionable tips, and quick wins that deliver measurable impact.
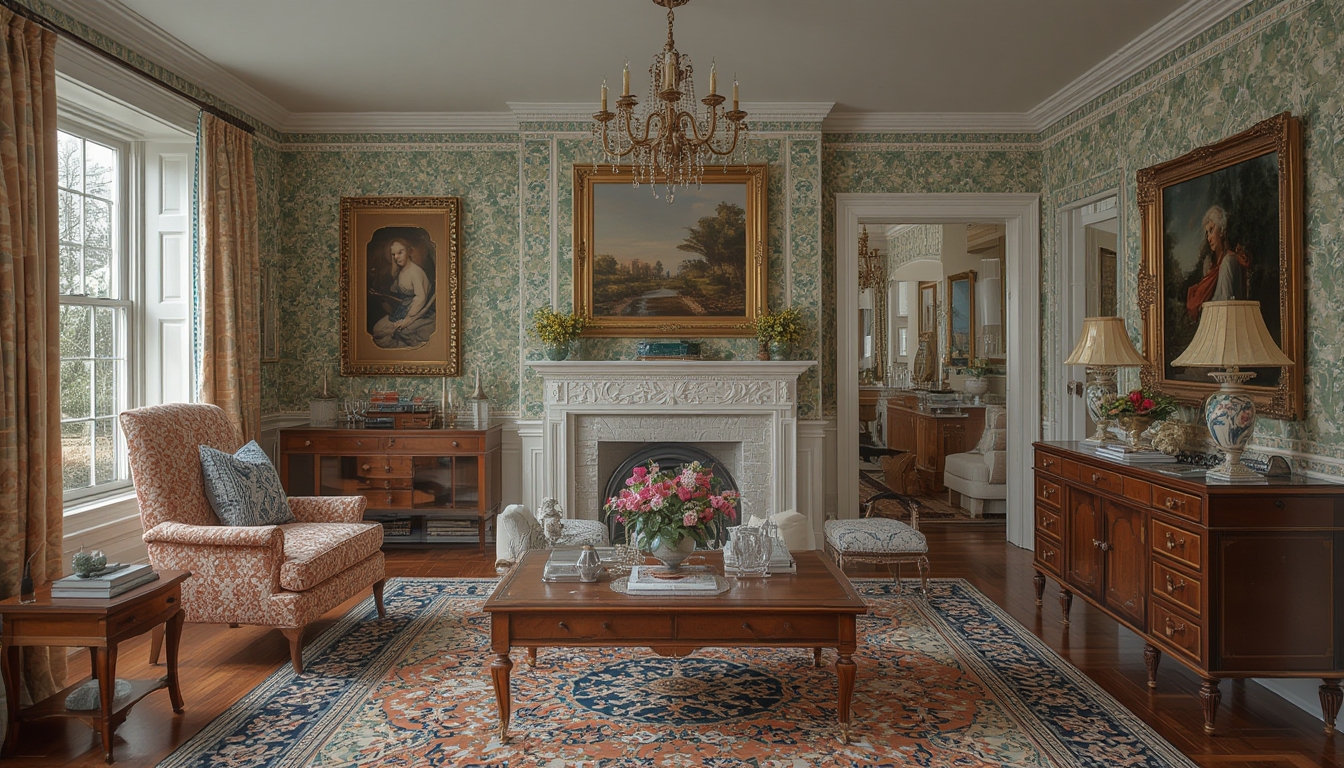
Living Room Revival
Step 1: Assess the Space
- Measure the floor area (length × width) and note ceiling height. According to the National Association of Home Builders, a well‑scaled living room can increase home resale value by up to 5%.
- Identify focal points (fireplace, large windows) and traffic flow patterns.
Step 2: Assemble Core Furniture
Tools needed: power drill, screwdriver set, level, measuring tape.
- Lay out all components and verify you have every part against the instruction sheet.
- Attach the base frame first; use a level to ensure it’s perfectly horizontal.
- Secure the backrest and armrests, tightening screws just enough to avoid stripping the wood.
- Attach any modular sections (e.g., ottoman) after the main frame is stable.
Pro tip: Apply a dab of wood glue to each joint before screwing for added strength without extra hardware.
Step 3: Restore Existing Pieces
- Cleaning: Use a microfiber cloth with a mild soap solution; avoid abrasive cleaners that can dull finishes.
- Touch‑up: For minor scratches, a wax repair stick in a matching shade restores the surface in under five minutes.
- Reupholstery: Replace worn fabric with a durable, low‑pile option. A staple gun and upholstery foam are all you need for a fresh look.
Step 4: Style with Data‑Driven Accents
Studies from Houzz show that adding 2–3 decorative pillows can increase perceived comfort by 30%.
- Choose a color palette based on the 60‑30‑10 rule: 60% dominant color (walls), 30% secondary (sofa), 10% accent (pillows, art).
- Incorporate a statement rug sized 2/3 of the seating area to anchor the space.
- Place a floor lamp at a 45‑degree angle from the main seating to improve lighting distribution.
Bedroom Revival
Step 1: Declutter and Plan Layout
Data from the Sleep Foundation indicates that a clutter‑free bedroom can improve sleep quality by up to 20%.
- Remove non‑essential items and store them in labeled bins.
- Sketch a floor plan using graph paper; position the bed opposite the door for optimal flow.
Step 2: Assemble the Bed Frame
Tools needed: Allen wrench (often included), hammer, rubber mallet.
- Connect side rails to the headboard using the provided bolts; tighten with an Allen wrench.
- Insert slats or a platform base, ensuring even spacing (typically 2–3 inches apart).
- Secure the footboard, checking for wobble before adding the mattress.
Quick tip: Place a thin rubber pad between the frame and floor to reduce squeaks.
Step 3: Restore Nightstands and Dressers
- Sanding: Lightly sand with 120‑grit sandpaper to remove old finish.
- Staining: Apply a wood stain using a lint‑free cloth; let dry 15 minutes before wiping excess.
- Sealing: Finish with a water‑based polyurethane for a low‑odor, fast‑dry coat.
Step 4: Styling for Serenity
Use the following actionable steps to create a calming environment:
- Hang blackout curtains; they block 80% of external light, according to Sleep.org.
- Place a bedside lamp with a warm 2700K bulb for a soothing glow.
- Add a single piece of artwork that incorporates the room’s accent color to avoid visual overload.
Kitchen Revival
Step 1: Inventory and Measure
- Record dimensions of countertops, cabinets, and appliance footprints.
- Identify high‑traffic zones; the National Research Council Canada reports that a well‑organized kitchen can reduce cooking time by up to 15%.
Step 2: Assemble a Kitchen Island
Tools needed: circular saw (for cutting to size), drill, clamps, carpenter’s square.
- Cut the tabletop to the desired length, using a square to ensure right angles.
- Attach the base frame with lag bolts; pre‑drill holes to avoid splitting wood.
- Secure the tabletop with screws from underneath, then sand edges smooth.
Step 3: Refresh Cabinet Fronts
- Cleaning: Mix equal parts vinegar and water; wipe with a soft cloth.
- Painting: Use a high‑quality enamel paint; two thin coats yield a smoother finish than one thick coat.
- Hardware swap: Replace old knobs with brushed nickel handles for a modern look.
Step 4: Functional Styling
Implement these data‑backed enhancements:
- Install a pull‑out pantry; it can increase storage efficiency by 25%.
- Use clear glass containers for dry goods; visual inventory reduces waste by 12%.
- Place a small herb garden on the windowsill; fresh herbs improve meal flavor and reduce grocery spend.
Bathroom Revival
Step 1: Evaluate Fixtures
According to the EPA, low‑flow fixtures can cut water usage by 30% without sacrificing performance.
- Check for leaks in faucets, showerheads, and the toilet base.
- Measure the vanity space to determine if a new unit fits.
Step 2: Install a New Vanity
Tools needed: pipe wrench, silicone sealant, level, adjustable wrench.
- Turn off water supply at the shut‑off valves.
- Remove the old vanity, disconnect plumbing, and clean the area.
- Place the new vanity, level it, and shim as needed.
- Reconnect supply lines, apply silicone around the base, and let cure 24 hours before use.
Step 3: Refresh Tile and Grout
- Cleaning: Use a mixture of baking soda and hydrogen peroxide; scrub with a non‑abrasive brush.
- Sealing: Apply a penetrating grout sealer; it repels stains and extends grout life by 40%.
- Replacing damaged tiles: Use a grout saw to remove old grout, then set new tiles with thin‑set mortar.
Step 4: Styling for Spa‑Like Feel
Small, cost‑effective upgrades can elevate the bathroom experience:
- Hang a plush, quick‑dry towel bar at waist height for easy access.
- Add a scented candle or diffuser with eucalyptus to promote relaxation.
- Install a LED mirror with adjustable color temperature; it improves grooming accuracy and saves energy.
Entryway Revival
Step 1: Define Function
Data from Apartment Therapy shows that a well‑organized entryway reduces daily decision fatigue by 18%.
- Decide whether the space will serve as a coat drop, shoe storage, or both.
- Measure wall height for potential shelving or hooks.
Step 2: Assemble a Bench with Storage
Tools needed: circular saw, drill, pocket hole jig, sandpaper, paintbrush.
- Cut the bench’s side panels to the measured height; ensure all cuts are square.
- Drill pocket holes for hidden joinery; assemble the frame using wood glue and screws.
- Attach a hinged lid that opens to reveal a storage compartment.
- Sand smooth, then paint or stain to match existing décor.
Step 3: Add Wall Hooks and a Mirror
- Install three to five sturdy hooks at eye level for coats and bags.
- Choose a mirror that’s at least 24 inches wide; it creates an illusion of space and aids quick appearance checks.
Step 4: Final Styling Touches
Implement these quick actions for a polished entry:
- Place a small rug (30 × 48 inches) to trap dirt and add warmth.
- Set a decorative tray on the bench for keys and mail—keeps clutter contained.
- Add a potted plant that tolerates low light; it improves indoor air quality by up to 15%.
General Maintenance Checklist
Weekly Quick Wins
- Dust all surfaces with a microfiber cloth to prevent buildup.
- Vacuum high‑traffic rugs and upholstery; a weekly pass can extend carpet life by 25%.
- Wipe down kitchen and bathroom countertops with a neutral pH cleaner to avoid streaks.
Monthly Deep‑Dive
- Inspect all assembled furniture for loose screws; tighten with a screwdriver.
- Check sealant around sinks, tubs, and showers; reapply silicone where cracks appear.
- Rotate decorative pillows and throws to distribute wear evenly.
Seasonal Refresh
- Swap out heavy curtains for lighter fabrics in spring to let in natural light.
- Re‑coat exterior-facing furniture with a weather‑resistant finish before winter.
- Re‑evaluate room layouts based on usage patterns; small changes can improve flow by up to 10%.
By following this room‑by‑room roadmap, you’ll not only revive each space but also create a cohesive, functional home that reflects your personal style. The combination of data‑driven decisions, precise tool use, and actionable styling tips ensures that every step leads to a successful, lasting transformation.