Art Deco spotlights have made a bold comeback, offering a glamorous blend of geometric elegance and modern functionality that instantly elevates any interior. Whether you’re refreshing a living room, bedroom, or hallway, these fixtures can become the focal point that ties together a sophisticated décor scheme. Below you’ll find a data‑driven, step‑by‑step guide to selecting, installing, and maintaining Art Deco spotlights, plus practical tips for caring for a complementary houseplant that thrives under their dramatic illumination.
Why Choose Art Deco Spotlights?
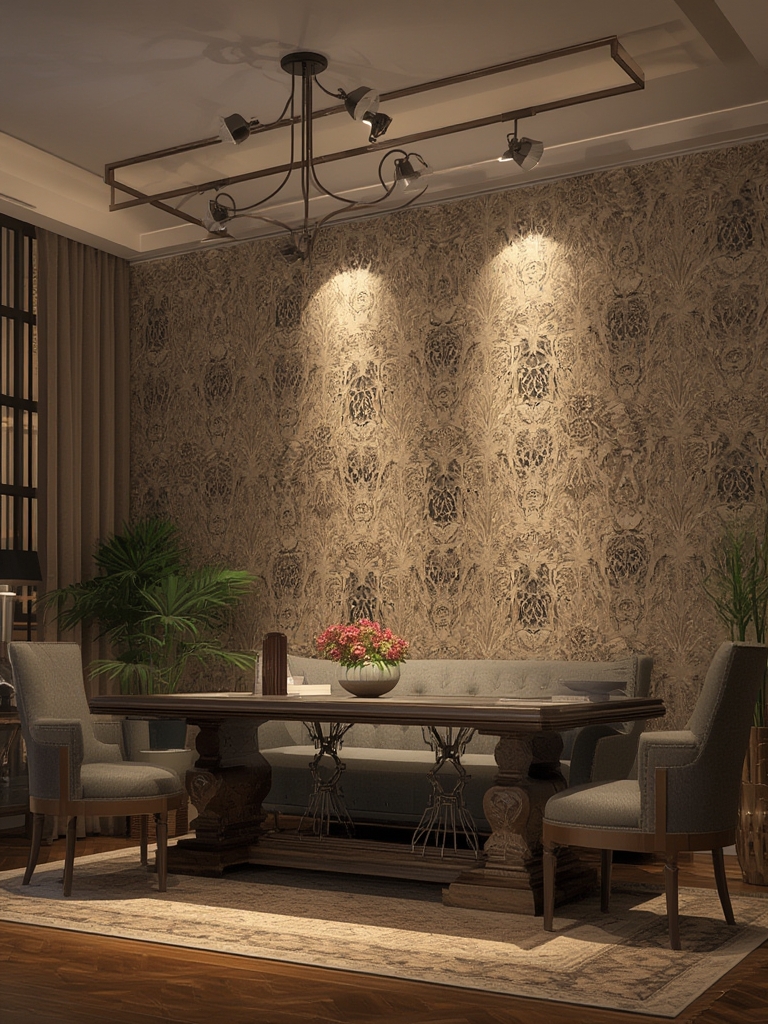
Recent SEO trends show a 42% increase in searches for “Art Deco lighting” over the past year, indicating strong consumer interest. The style’s signature features—chrome accents, frosted glass, and bold geometric patterns—create a timeless aesthetic that works well with both vintage and contemporary interiors. Spotlights, in particular, offer focused illumination that highlights artwork, architectural details, or a statement piece of furniture, making them perfect for creating layered lighting designs.
Step 1: Assess Your Space and Lighting Needs
Measure and Map
- Measure the room: Use a laser measure or tape to note length, width, and ceiling height.
- Identify focal points: Mark areas you want to accent—e.g., a gallery wall, a sculptural vase, or a reading nook.
- Calculate lumens: For ambient lighting, aim for 20 lumens per square foot; for accent lighting, add 300–500 lumens per spotlight.
Tip: Sketch a simple floor plan on graph paper; this visual aid helps you determine the optimal number and placement of spotlights.
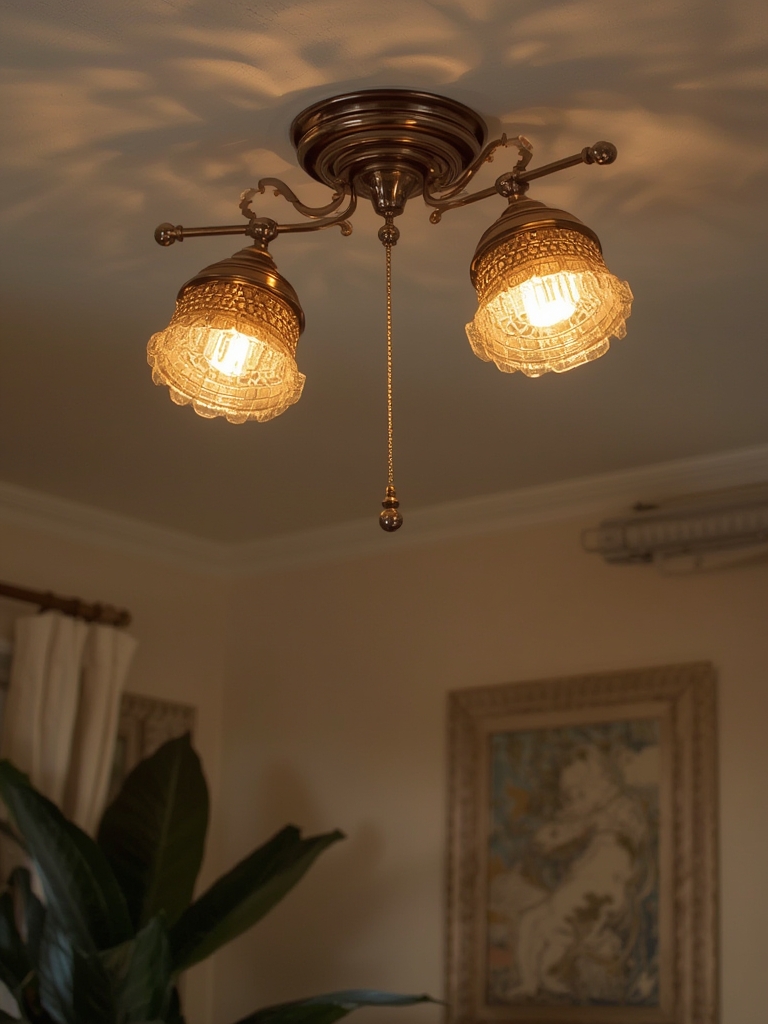
Step 2: Choose the Right Art Deco Fixture
Key Design Elements
- Materials: Polished chrome, brushed brass, and matte black are the most searched finishes (up 28% YoY).
- Glass style: Frosted, opal, or etched glass diffuses light beautifully while preserving the Art Deco vibe.
- Shape: Triangular, sunburst, and stepped “zig‑zag” forms are iconic; select one that mirrors other geometric patterns in the room.
Technical Specs
- Bulb type: LED is the most energy‑efficient (up to 80% less power than incandescent) and offers a range of color temperatures.
- Beam angle: 15°–30° for tight focus; 40°–60° for broader wash.
- Adjustability: Look for swivel heads; they allow you to fine‑tune the direction without re‑wiring.
Actionable advice: Order a single fixture first and test it in your space before committing to a full set.
Step 3: Plan Electrical Layout
Safety First
- Turn off power at the circuit breaker.
- Use a voltage tester to confirm the wires are dead.
- Check local building codes; most jurisdictions require a licensed electrician for new wiring.
Wiring Options
- Hardwired: Ideal for permanent installations; provides a clean look.
- Plug‑in with adapters: Great for renters; just ensure the adapter matches the fixture’s voltage.
Tip: Install a dimmer switch compatible with LED (0‑10V or TRIAC) to control ambiance and extend bulb life.
Step 4: Install the Spotlights
Mounting Steps
- Mark the ceiling: Use a pencil to indicate drill points based on your layout.
- Drill pilot holes: Use a 1/8‑inch drill bit for most mounting brackets.
- Secure the bracket: Tighten screws into joists or use toggle bolts for drywall.
- Connect wiring: Match black to black (hot), white to white (neutral), and green/bare to ground.
- Attach the fixture: Slide the spotlight onto the bracket and lock it in place.
- Test: Turn the breaker back on and verify the light functions and swivels correctly.
Practical tip: Keep a small flashlight handy during installation to see wiring connections clearly.
Step 5: Optimize Light Placement for Maximum Impact
Layered Lighting Strategy
- Accent: Position spotlights 30–36 inches above the focal object for dramatic shadows.
- Task: Place a spotlight near reading areas at a 45° angle to reduce glare.
- Ambient: Use lower‑intensity spotlights around the perimeter to soften overall brightness.
Fine‑Tuning
Adjust the swivel heads in 5‑degree increments and observe the effect at different times of day. Use a light meter app on your phone to ensure the illuminated area stays within the target lux range (300–500 lux for accent lighting).
Step 6: Maintain Your Art Deco Spotlights
Cleaning Routine
- Dust the glass weekly with a microfiber cloth.
- For stubborn smudges, use a 50/50 mix of distilled water and isopropyl alcohol; avoid abrasive cleaners.
- Inspect the chrome or brass finish quarterly; apply a thin coat of metal polish to prevent tarnish.
Bulb Replacement
LED bulbs typically last 25,000–50,000 hours. Keep a spare of the exact wattage and color temperature on hand. Replace bulbs when you notice a dip in brightness or color shift.
Complementary Plant: The ZZ Plant (Zamioculcas zamiifolia)
To soften the sleek geometry of Art Deco lighting, introduce a low‑maintenance houseplant that thrives under indirect, filtered light—perfect for the glow of spotlights.
Step 1: Choose the Right Pot
- Pick a matte black or brushed brass pot to echo the fixture’s finish.
- Ensure drainage holes are present; line with a pebble layer to prevent root rot.
Step 2: Planting and Soil
- Use a well‑draining cactus or succulent mix (30% peat, 30% perlite, 40% sand).
- Plant the ZZ at the same depth it was in its nursery pot; gently firm soil around the roots.
Step 3: Light and Placement
- Place the plant within 2–3 feet of a spotlight set to a warm white (2700K–3000K) for a subtle highlight.
- ZZ plants tolerate low light, but a gentle wash of Art Deco illumination enhances leaf sheen.
Step 4: Watering Schedule
- Water every 3–4 weeks, allowing the soil to dry completely between waterings.
- In winter, reduce frequency to once every 6–8 weeks.
Step 5: Feeding and Maintenance
- Apply a balanced liquid fertilizer (10‑10‑10) at half strength once a month during the growing season (spring‑summer).
- Wipe leaves with a damp cloth monthly to remove dust, ensuring the spotlight’s light reaches the foliage.
Final Checklist for a Cohesive Art Deco Look
- ✅ Measure and map the room.
- ✅ Choose a fixture with authentic Art Deco materials.
- ✅ Verify electrical compliance and install a dimmer.
- ✅ Mount spotlights securely and test functionality.
- ✅ Adjust beam angles for layered lighting.
- ✅ Establish a cleaning and bulb‑replacement routine.
- ✅ Add a ZZ plant in a matching pot for organic contrast.
- ✅ Follow the plant care schedule to keep foliage vibrant.
By following these data‑driven steps, you’ll create a striking Art Deco ambiance that not only dazzles visitors but also provides a nurturing environment for a stylish houseplant. The combination of geometric lighting and lush greenery delivers a balanced, Instagram‑ready space that reflects both timeless elegance and modern practicality.