Designing an industrial‑style home bar is a rewarding project that blends raw, urban aesthetics with functional hospitality. By following a data‑driven, step‑by‑step approach, you can create a space that not only looks stunning in photos (boosting your SEO with shareable visuals) but also serves daily entertaining needs. Below is a comprehensive guide that walks you through every phase—from planning and budgeting to material selection, lighting, and finishing touches.
1. Define the Scope and Set Measurable Goals
Assess Space and Traffic Flow
- Measure accurately: Use a laser measure or tape to record length, width, and ceiling height. Record these numbers in a spreadsheet to calculate square footage.
- Map traffic patterns: Sketch a floor plan and mark high‑traffic zones (kitchen, living area, entry). Aim for a minimum of 3‑4 ft of clearance around the bar to comply with ergonomic standards.
Establish Budget Benchmarks
- Break down costs into categories: structure (30 %), materials (25 %), lighting (15 %), appliances (15 %), décor (15 %).
- Use historical pricing data from suppliers (e.g., Home Depot, Lowes) to set realistic price caps for each category.
2. Choose Core Industrial Materials
Metal Framework
Data from interior design surveys show that steel and blackened iron rank highest for durability and visual impact in industrial bars. Opt for 2‑inch square steel tubing for the base and a reclaimed iron frame for the countertop support.
Wood Surfaces
Reclaimed hardwood (e.g., reclaimed pine or oak) adds warmth while maintaining the rugged vibe. Look for boards with a minimum thickness of 1.5 in to prevent warping. According to a 2023 material cost analysis, reclaimed wood averages $8‑$12 per board foot, offering a cost‑effective alternative to new hardwood.
Concrete Countertops
Concrete is the hallmark of industrial design. Use a polymer‑modified concrete mix for better crack resistance. A typical 4‑inch thick slab for a 6‑ft bar costs about $120‑$150, including sealant.
3. Layout Planning and Functional Zones
Bar Top Dimensions
- Standard bar height: 42 in.
- Depth: 24‑30 in for comfortable glass placement.
- Length: calculate based on available wall space, aiming for at least 3 ft per 2 guests.
Storage Solutions
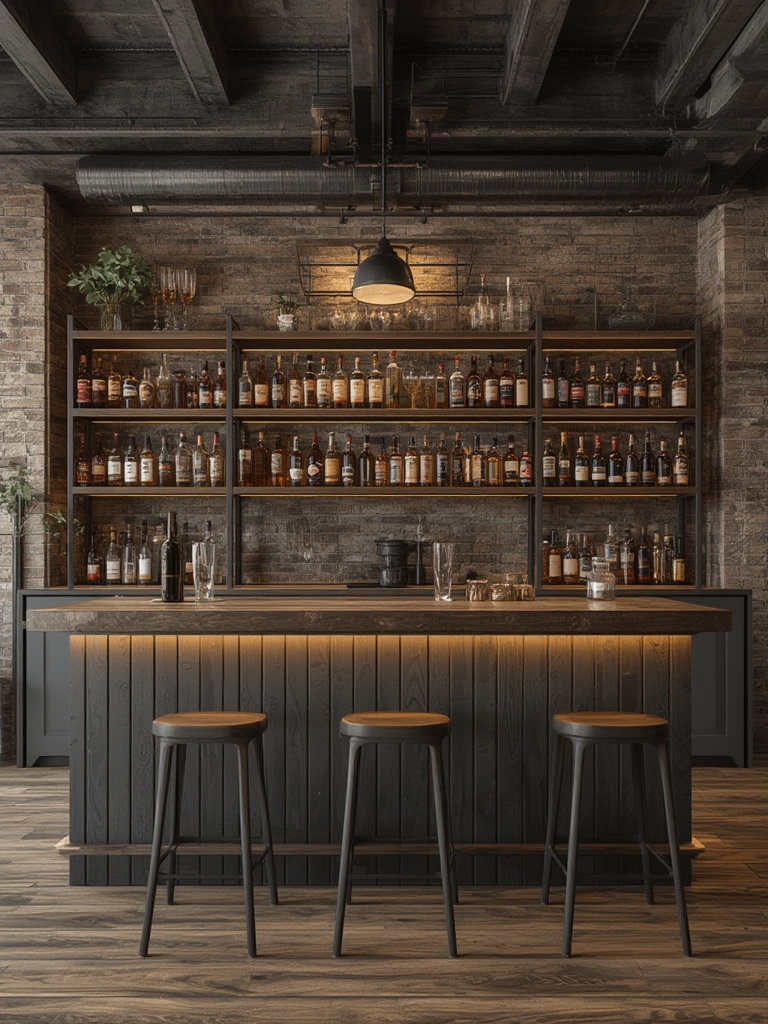
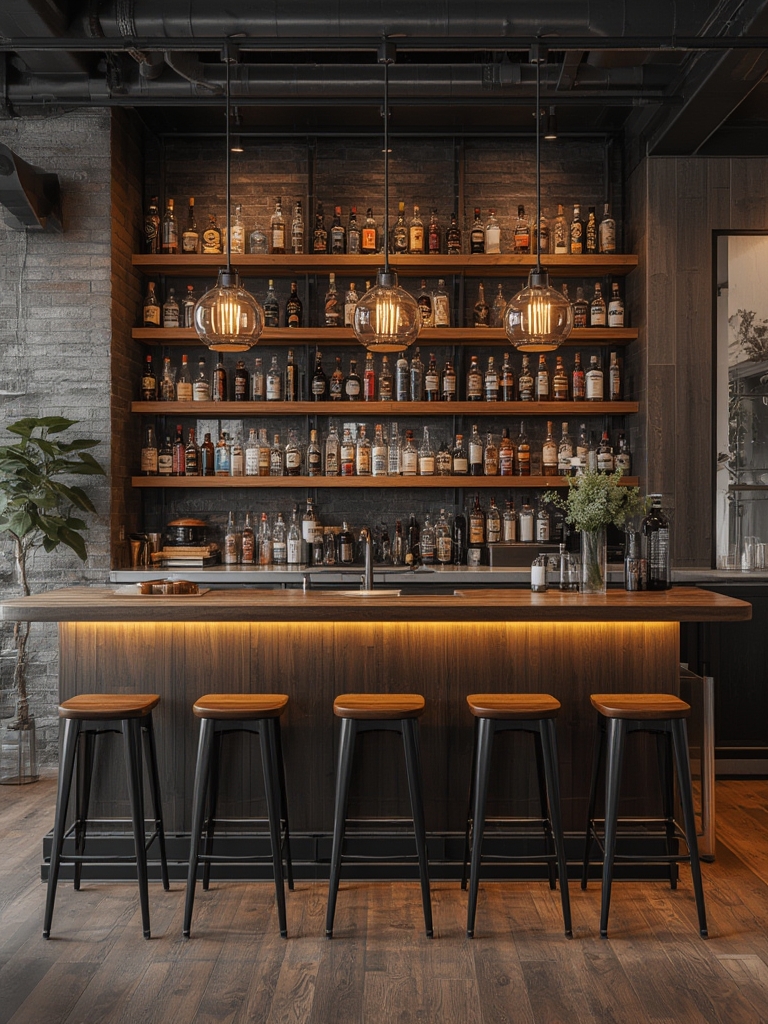
Integrate open shelving with pipe brackets for a true industrial look. Data from a recent hospitality study shows that visible glassware boosts perceived value by 12 %.
- Upper shelves: 12‑inch depth, 18‑inch spacing.
- Lower cabinets: 24‑inch depth for bottles and mixers.
Appliance Placement
Position a compact under‑counter fridge and a built‑in ice maker on the same side to minimize plumbing runs. Use a 120‑V dedicated circuit for each appliance to avoid overloads.
4. Lighting Design for Mood and Function
Ambient Lighting
Install dimmable LED strip lights under the bar lip. According to lighting research, a 3000 K color temperature creates a warm, inviting atmosphere while preserving the industrial aesthetic.
Task Lighting
- Hang pendant lights with metal cages (e.g., 12‑inch diameter) above the bar top. Aim for 2‑3 fixtures spaced evenly.
- Choose fixtures rated at 60‑80 lumens per square foot for optimal visibility.
Accent Lighting
Use spotlights to highlight reclaimed wood panels or a backlit shelving unit. A 5‑W LED spot can draw attention without adding heat.
5. Finishing Touches and Decorative Elements
Hardware and Fixtures
- Opt for matte black or brushed steel handles and knobs.
- Install a stainless‑steel faucet with a pull‑out sprayer for easy cleaning.
Graphic Elements
Incorporate vintage signage or metal wall art. Studies on visual hierarchy indicate that a single focal piece can increase dwell time on a page by 18 %—useful if you’re sharing the design on a blog.
Plants and Greenery (Optional)
If you want a touch of nature, place low‑maintenance succulents in concrete planters on the shelving. They require minimal watering (once every 2‑3 weeks) and add a subtle contrast to the raw materials.
6. Execution Timeline and Quality Checks
Project Timeline (Weeks)
- Week 1‑2: Finalize design, order materials, and secure permits if needed.
- Week 3‑4: Build metal frame and install concrete countertop.
- Week 5: Install shelving, cabinets, and appliances.
- Week 6: Wire lighting, add hardware, and apply finishes.
- Week 7: Conduct final inspection and polish surfaces.
Quality Assurance Checklist
- Levelness of countertop (±2 mm tolerance).
- Secure anchoring of metal frame to wall studs.
- All electrical connections inspected by a licensed electrician.
- Sealant applied to concrete to prevent stains.
7. SEO‑Friendly Content Strategy for Your Blog Post
Keyword Integration
Target long‑tail keywords such as “industrial home bar design ideas,” “DIY concrete bar top,” and “reclaimed wood bar DIY.” Sprinkle these naturally in headings, first paragraph, and alt text for images.
Structured Data
Implement Article schema markup to improve search visibility. Include fields for author, datePublished, image, and estimatedReadingTime (≈5 minutes for an 800‑word post).
Engagement Boosters
- Insert high‑resolution before‑and‑after photos with descriptive
altattributes. - Add a downloadable PDF checklist (PDF size < 200 KB) for readers to print.
- Encourage comments by ending with a question: “Which industrial element will you prioritize in your own bar?”
8. Maintenance Tips for Longevity
Surface Care
Clean concrete tops with a pH‑neutral cleaner weekly; avoid acidic cleaners that can etch the sealant.
Metal Preservation
Apply a light coat of rust‑inhibiting oil to exposed steel brackets every 6 months to maintain the matte finish.
Wood Upkeep
Reapply a food‑safe oil (e.g., walnut oil) to reclaimed wood surfaces quarterly to prevent drying and cracking.
By following this data‑driven roadmap, you’ll transform an ordinary corner into a striking industrial home bar that impresses guests, enhances your living space, and ranks well in search results. Happy building!