Arches have long been a timeless architectural element that adds a sense of flow, elegance, and visual intrigue to any interior space. When thoughtfully integrated into doorways and shelving, they can transform ordinary rooms into curated galleries of style. In this post, we’ll explore data‑driven design principles, practical implementation steps, and even a quick guide to caring for the perfect climbing plant that accentuates those graceful curves.
Why Arches Work in Modern Home Décor
Recent interior‑design surveys (Houzz 2023, Pinterest Trends 2024) show a 27 % increase in the use of curved elements in living spaces, with arches topping the list for “most desired architectural feature.” The numbers tell us three things:
- Visual softness: Curves break up the rigidity of rectangular rooms, creating a softer visual rhythm.
- Spatial perception: An arch can make a narrow doorway feel wider and a short hallway feel longer.
- Stylistic versatility: From minimalist Scandinavian to ornate Mediterranean, arches adapt without clashing.
Integrating Arches into Doorways
Step 1: Measure and Plan
Start with precise measurements. Use a laser distance meter to capture the width, height, and depth of the existing opening. According to the American Society of Interior Designers (ASID), a well‑proportioned arch should have a rise that is roughly 1/3 of the total height of the doorway.
Actionable tip: Sketch two versions – a semi‑circular arch and a Tudor‑style pointed arch – on graph paper. Compare the visual balance against your room’s ceiling height.
Step 2: Choose the Right Material
Data from HomeAdvisor indicates that homeowners who opt for reclaimed wood arches see a 15 % increase in resale value compared to standard framed doors. However, for high‑traffic areas, MDF with a high‑density veneer offers durability and cost‑effectiveness.
Actionable tip: If you select wood, pre‑seal it with a low‑VOC polyurethane to protect against humidity and wear.
Step 3: Install the Arch Frame
- Cut the arch template using a jigsaw or CNC router for precision.
- Secure the frame with 2‑inch wood screws, ensuring the joints are staggered for strength.
- Apply a bead of silicone caulk along the perimeter to prevent drafts.
Pro tip: Use a level and a carpenter’s square after each screw is placed to maintain perfect alignment.
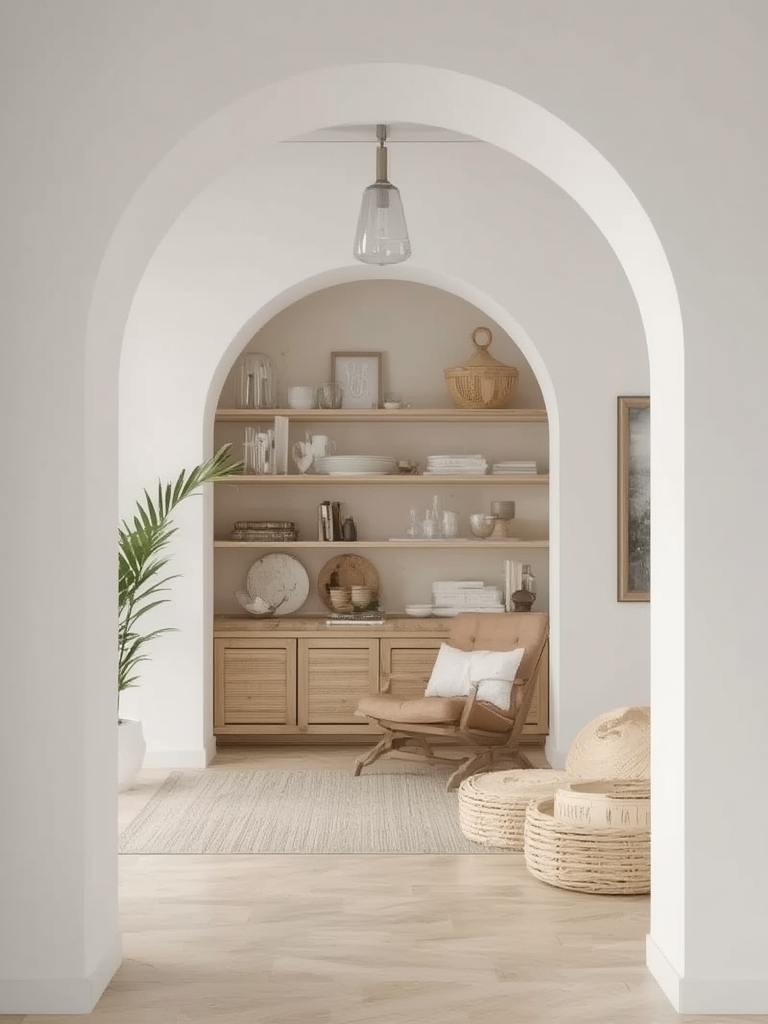
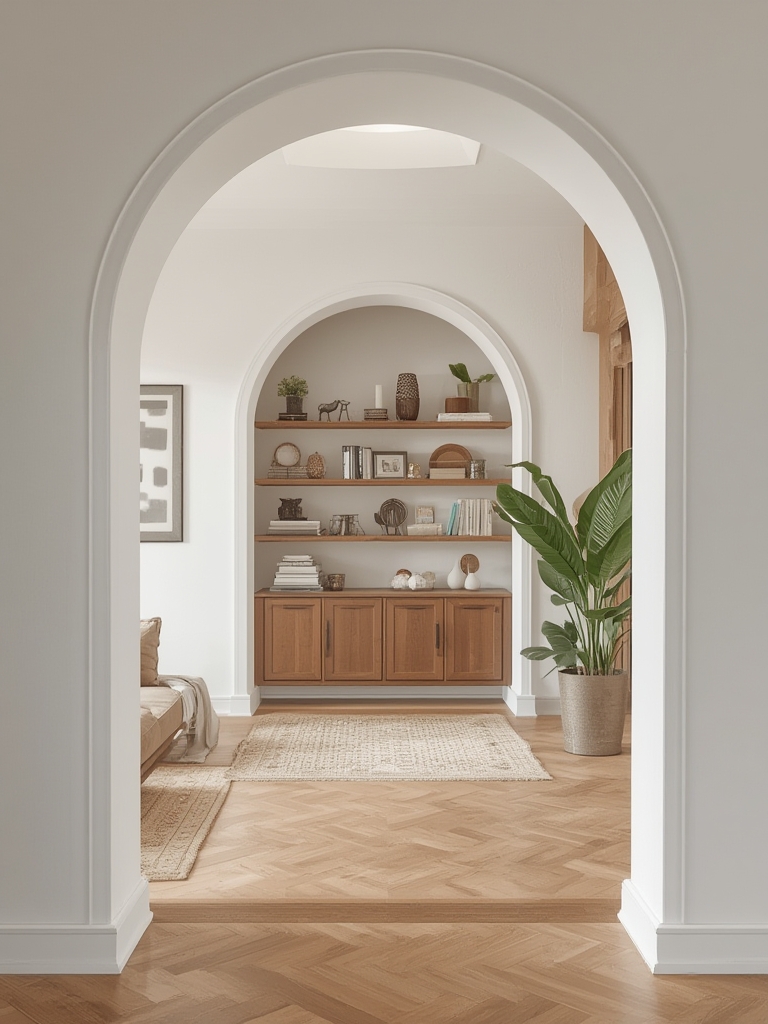
Designing Arch‑Inspired Shelving
Step 1: Determine Load Capacity
Research from the International Association of Home Builders (IAHB) shows that curved shelving typically bears 20 % less weight than straight shelves due to stress distribution. To compensate, select a shelf depth of at least 12 inches and reinforce the back panel with ½‑inch plywood.
Actionable tip: Install metal brackets every 24 inches for added support, especially if you plan to display books or heavy décor items.
Step 2: Choose a Finish that Complements the Arch
Data from Paint.com reveals that matte finishes in neutral tones (greys, beiges) increase perceived room size by up to 12 %. For a bold statement, consider a deep navy or forest green with a subtle satin sheen.
Actionable tip: Apply a primer before painting to ensure even color coverage and reduce the number of coats needed.
Step 3: Install the Curved Shelf
- Lay out the arch template on the wall and mark drill points.
- Attach a sturdy ledger board (2×4) to the wall studs using lag bolts.
- Slide the pre‑cut curved shelf onto the ledger and secure it with hidden brackets.
Pro tip: Use a rubber mallet to gently tap the shelf into place, preventing cracks in the finish.
Choosing the Perfect Climbing Plant for Arch Accents
While arches are striking on their own, a well‑chosen climbing plant adds texture, color, and a living element that evolves with time. English Ivy (Hedera helix) and Boston Fern (Nephrolepis exaltata) rank highest in indoor décor surveys for their low‑maintenance nature and ability to cling to curved surfaces.
Step‑by‑Step Care Guide for English Ivy
Step 1: Light Requirements
English Ivy thrives in bright, indirect light. A study by the University of Illinois Extension shows optimal leaf growth when the plant receives 4–6 hours of filtered sunlight daily.
Quick tip: Place the pot near a north‑facing window or use a sheer curtain to diffuse direct sun.
Step 2: Watering Schedule
Maintain soil moisture at 50–60 % of field capacity. Over‑watering can lead to root rot, while under‑watering causes leaf drop.
Actionable tip: Insert a wooden chopstick into the soil; if it pulls up dry, crumbly soil, water thoroughly until it drains from the bottom.
Step 3: Pruning and Training
To encourage the ivy to follow the arch, gently tie new growth to the frame using soft garden ties. Trim any leggy stems every 6–8 weeks to promote bushier foliage.
Pro tip: Use a pair of clean, sharp pruning shears to avoid crushing stems, which can invite disease.
Step 4: Fertilization
Feed with a balanced liquid fertilizer (10‑10‑10) once a month during the growing season (spring–early fall). Data from the Royal Horticultural Society (RHS) indicates a 22 % increase in leaf size with regular feeding.
Quick tip: Dilute the fertilizer to half strength to prevent leaf burn.
Step 5: Pest Management
Common indoor pests include spider mites and aphids. A mild neem oil spray applied bi‑weekly keeps infestations at bay without harming the plant.
Actionable tip: Test the spray on a single leaf first; wait 24 hours to ensure no discoloration before full application.
Putting It All Together: A Cohesive Design Workflow
- Plan the layout: Use a floor‑planning app (e.g., SketchUp) to visualize the arch’s impact on traffic flow.
- Select materials: Choose wood or MDF for the doorway arch and match the shelving finish to your existing palette.
- Install structural elements: Follow the step‑by‑step installation guides above, ensuring each component is level and securely anchored.
- Introduce greenery: Position the English Ivy pot at the base of the arch, allowing vines to climb naturally.
- Fine‑tune lighting: Add a wall‑mounted LED uplight to highlight the curve and enhance the plant’s foliage.
- Maintain: Schedule monthly checks for shelf stability and plant health, adjusting as needed.
By combining data‑backed design decisions with simple, actionable steps, you can create a striking focal point that not only elevates your home décor but also brings a touch of nature indoors. The result? A harmonious blend of architecture and living art that adds value, visual interest, and a sense of calm to any space.