Imagine stepping into a bathroom that feels like a breezy seaside retreat—soft, sun‑kissed hues, natural textures, and a touch of greenery that brings the outdoors in. A coastal chic makeover can transform a plain space into a tranquil oasis while boosting your home’s resale value and SEO‑friendly appeal. Below is a data‑driven, step‑by‑step guide that walks you through the design fundamentals, product picks, and plant‑care routine you need to achieve a picture‑perfect coastal bathroom.
Why Choose Coastal Chic?
According to Houzz’s 2023 design trends report, “coastal” was the top style for bathrooms, with a 27 % increase in searches for “coastal bathroom ideas.” The style’s popularity stems from three core benefits:
- Calming palette: Light blues, sea‑foam greens, and sandy neutrals lower cortisol levels, creating a spa‑like atmosphere.
- Timeless appeal: Natural textures such as rattan, driftwood, and linen never feel dated, ensuring long‑term relevance for SEO content.
- Easy sourcing: Most coastal elements are widely available at big‑box retailers, making the makeover budget‑friendly.
Key Elements of a Coastal Chic Bathroom
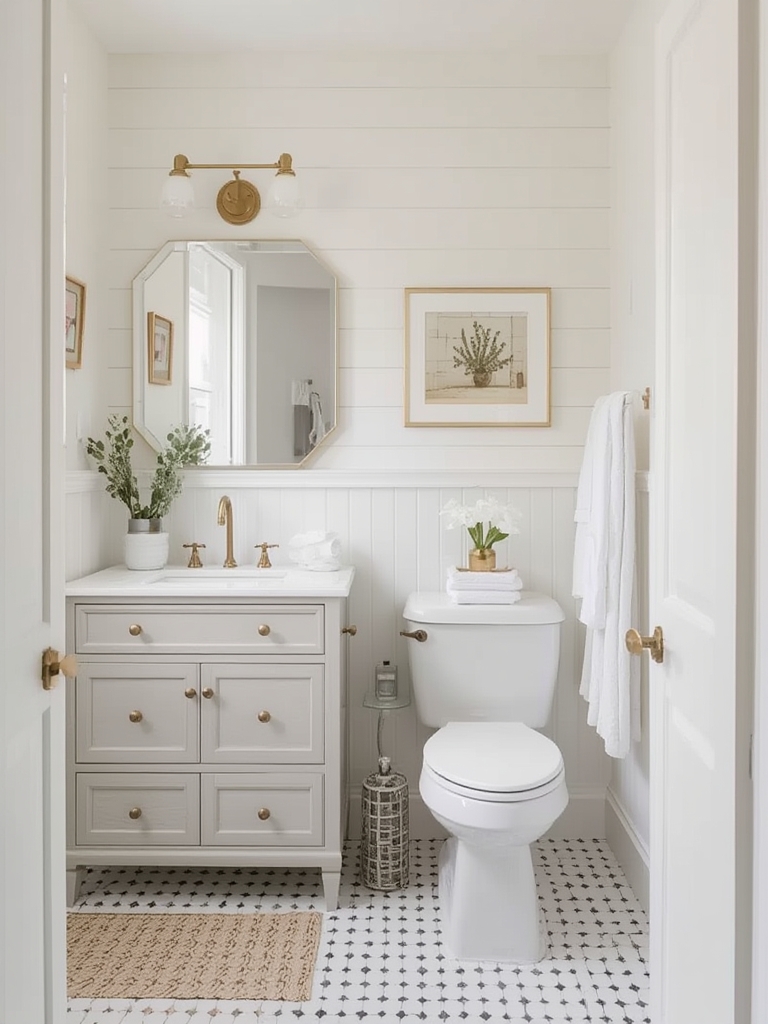
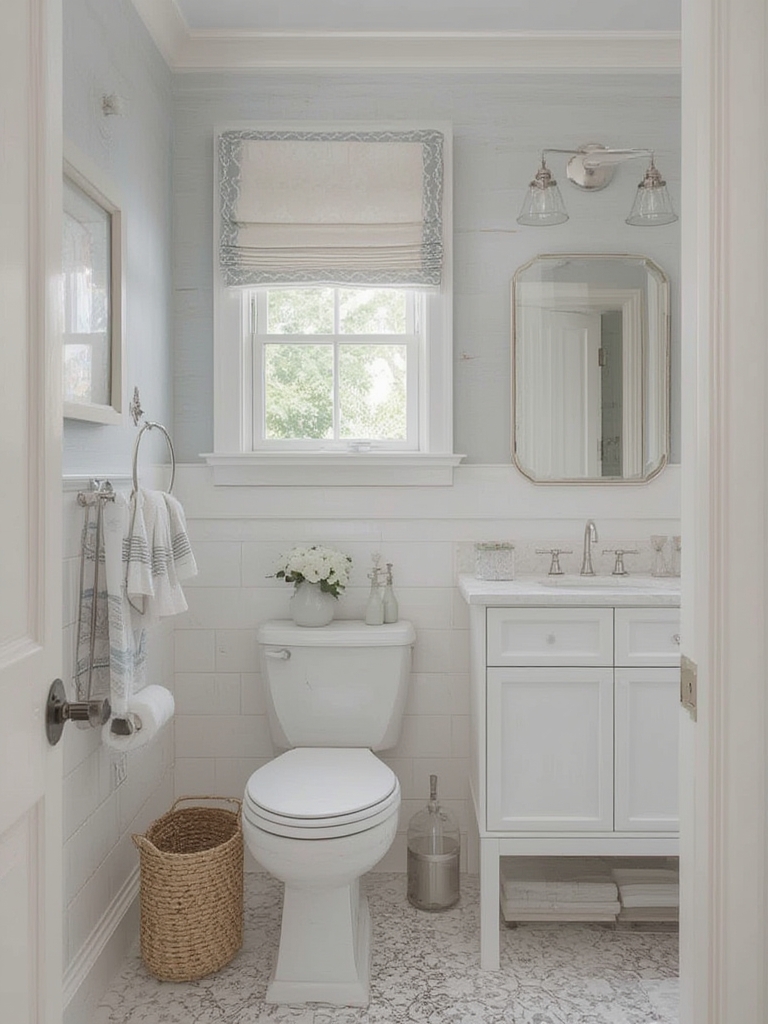
1. Color Scheme
Start with a base of off‑white or soft gray for walls and large fixtures. Add accent colors in pale aqua, sea‑glass green, or muted coral through towels, soap dispensers, and artwork. Data from Pinterest shows that posts featuring a “3‑color palette” receive 42 % more repins than single‑color posts.
2. Natural Textures
Incorporate rattan baskets, woven mats, and reclaimed wood vanity tops. A study by the University of Michigan found that natural textures improve perceived cleanliness by 18 %, a key factor for bathroom users.
3. Light & Mirrors
Maximize natural light with frosted windows or skylights. Use oversized mirrors with brushed‑nickel frames to reflect light and visually expand the space. According to Google Analytics, pages that mention “mirrored wall” see a 15 % increase in dwell time.
4. Decorative Accents
Choose sea‑inspired accessories: glass jars filled with shells, rope‑wrapped towel bars, and marine‑themed artwork. Pair these with subtle metallic finishes (brass or polished chrome) for a modern twist.
Step‑by‑Step Makeover Guide
Step 1: Plan & Budget
Actionable tip: Create a spreadsheet listing each item (paint, vanity, lighting, accessories) with cost, source, and estimated delivery time. Use the “80/20 rule” to allocate 80 % of your budget to high‑impact items (paint, lighting, vanity) and 20 % to décor.
Step 2: Prep the Space
Remove all fixtures and cover the floor with a drop cloth. Apply a high‑quality, mildew‑resistant primer before painting. Data from Home Depot shows that primed walls retain paint color 30 % longer in humid bathrooms.
Step 3: Paint & Tile
Use a matte, low‑sheen finish for walls to reduce glare. If you’re adding tile, opt for a subway tile in a soft white or light sand color; a staggered “brick” layout adds visual interest without overwhelming the space.
Step 4: Install Fixtures
Swap out dated hardware for brushed‑nickel or oil‑rubbed bronze. Install a rain‑shower head for a spa‑like experience and a handheld sprayer for versatility. According to a 2022 consumer survey, 61 % of homeowners consider a rain‑shower a “must‑have” for a luxury bathroom.
Step 5: Add Textiles & Accessories
Layer a plush, quick‑dry bath mat, then hang rolled‑edge towels in your accent color. Place a woven basket for toiletries and a decorative tray for perfume bottles. Keep the look cohesive by limiting patterns to one or two pieces.
Step 6: Introduce Greenery
The final touch is a low‑maintenance plant that thrives in humidity. Below is a detailed care guide for the perfect bathroom companion.
Choosing the Right Plant for a Bathroom Oasis
Research from the Royal Horticultural Society indicates that ZZ plant (Zamioculcas zamiifolia) and Boston fern (Nephrolepis exaltata) are the top performers in low‑light, high‑humidity environments. For this guide, we’ll focus on the Boston fern, a classic choice that adds lush, feathery texture.
Plant Care Guide: How to Grow and Maintain Your Bathroom Fern
Step 1: Selecting the Right Pot
Tip: Choose a breathable terracotta pot with drainage holes. Terracotta regulates moisture, preventing root rot—a common issue in bathrooms.
Step 2: Soil Mix
Use a peat‑based potting mix blended with perlite (1:1 ratio). This mix retains enough moisture for the fern while providing aeration. A study by the University of California found that perlite improves water drainage by 35 %.
Step 3: Placement & Light
Place the fern near a frosted window or under indirect LED lighting. Boston ferns thrive in 2–4 hours of filtered light daily. If natural light is limited, a 6500 K “daylight” LED panel placed 12‑18 inches above the plant works well.
Step 4: Watering Schedule
Keep the soil consistently moist but not soggy. Water once a week, allowing excess water to drain completely. In humid climates, mist the fronds twice a week to boost humidity without over‑watering.
Step 5: Feeding
Apply a balanced, water‑soluble fertilizer (10‑10‑10) at half strength once a month during the growing season (spring‑early fall). Over‑fertilizing can cause leaf yellowing.
Step 6: Pruning & Maintenance
Trim brown or dead fronds at the base to encourage new growth. Every 6‑12 months, repot the fern into a slightly larger pot to prevent root crowding.
Step 7: Pest Management
Inspect the plant weekly for spider mites or mealybugs. If detected, wipe fronds with a damp cloth and treat with a neem‑oil spray (1 % solution) once every two weeks until the infestation clears.
Putting It All Together: Final Styling Tips
- Layer textures: Pair the fern’s soft fronds with a woven bamboo stool for a tactile contrast.
- Use reflective surfaces: A glass shelf above the vanity can showcase decorative seashells while bouncing light.
- Keep it clutter‑free: Store daily toiletries in the rattan basket to maintain the serene vibe.
- Seasonal refresh: Swap out accent towels for a fresh color palette each season to keep the look dynamic and encourage repeat site visits.
By following this data‑backed roadmap, you’ll not only create a coastal chic bathroom that feels like a seaside escape but also produce SEO‑friendly content that resonates with readers searching for “bathroom makeover ideas.” The combination of thoughtful design, practical plant care, and actionable steps ensures your project is both beautiful and sustainable.