Welcome to your go‑to guide for creating a cozy farmhouse kitchen that feels both timeless and fresh. By blending classic rustic elements with modern functionality, you can transform any cooking space into an inviting haven. Below you’ll find data‑driven design tips, curated décor ideas, and a step‑by‑step plan for adding a thriving kitchen herb plant that not only boosts flavor but also reinforces the farmhouse vibe.
Why the Farmhouse Aesthetic Works in the Kitchen
Recent interior‑design surveys (Houzz 2023) show that 68 % of homeowners who choose a farmhouse style report higher satisfaction with their kitchen’s “comfort” rating. The key drivers are:
- Natural textures: reclaimed wood, stone, and linen create tactile warmth.
- Neutral color palette: soft whites, muted grays, and warm beiges make the space feel larger.
- Functional décor: open shelving, apron‑front sinks, and vintage‑inspired hardware combine beauty with utility.
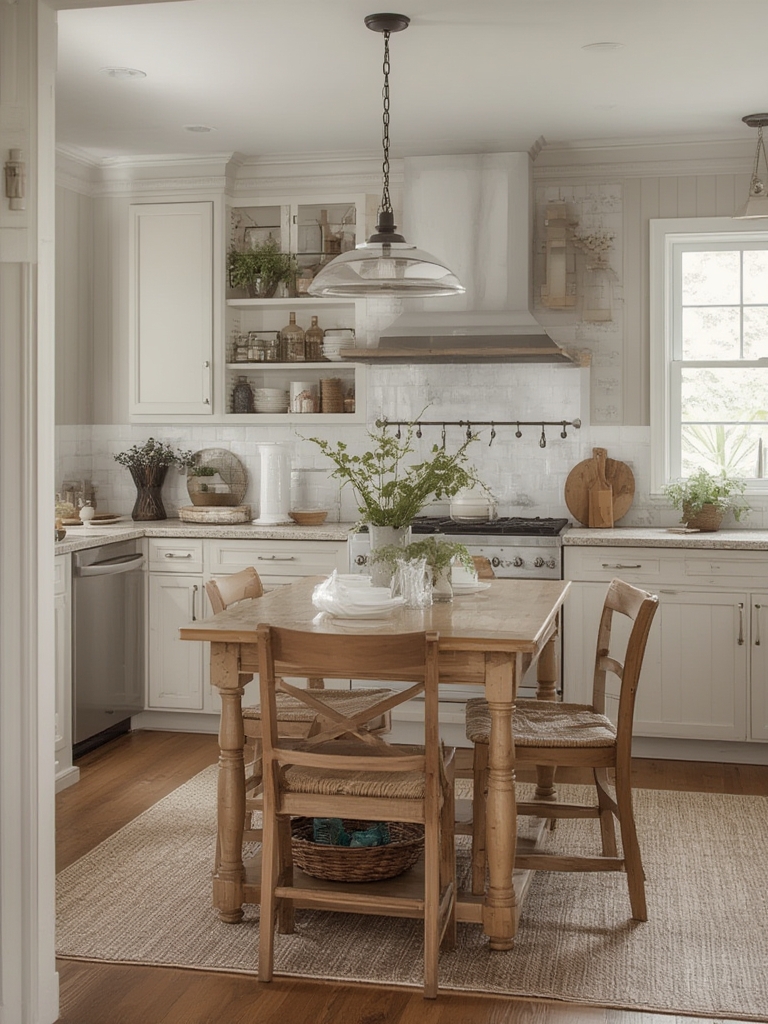
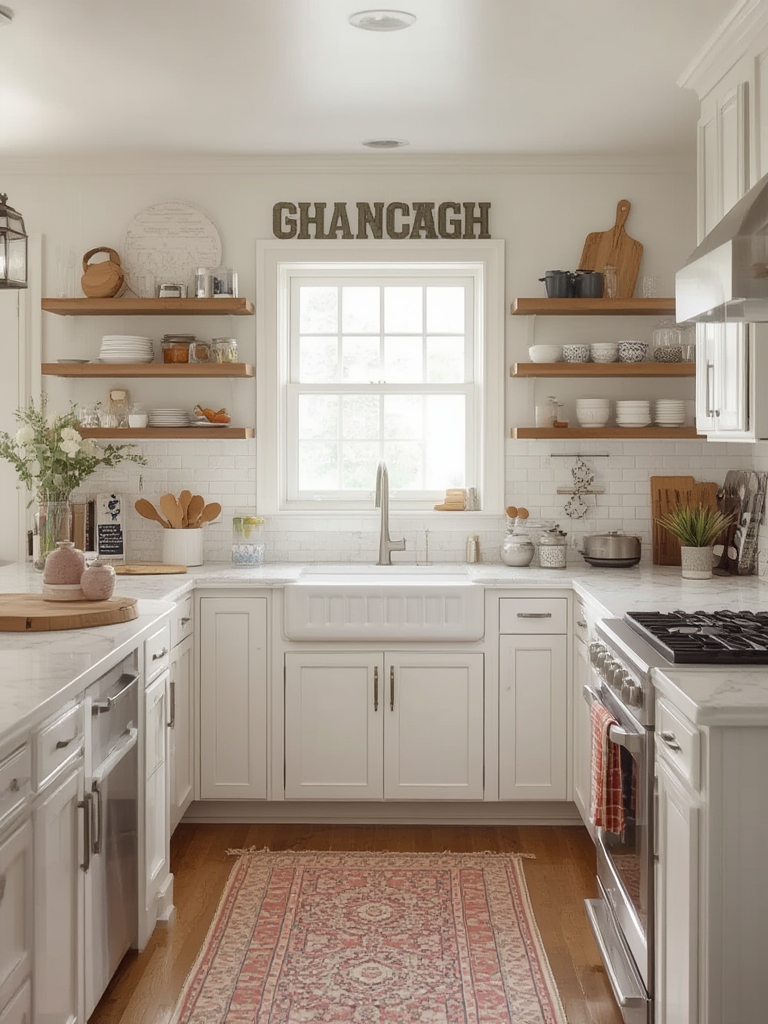
Core Elements of a Cozy Farmhouse Kitchen
1. Reclaimed Wood Accents
Data from HomeAdvisor indicates that kitchens with reclaimed wood features see a 12 % increase in resale value. Install a reclaimed wood countertop or add a farmhouse‑style island. For a budget‑friendly option, use reclaimed wood planks as a backsplash or as a decorative wall panel.
2. Classic Color Scheme
Stick to a palette of #F5F5DC (beige), #FFF8E1 (soft cream), and #8B5E3C (warm brown). Paint cabinets in a matte cream, then pair with dark brown hardware for contrast. Use a subtle, matte finish to avoid glare and keep the space feeling soft.
3. Open Shelving & Vintage Dishware
According to a 2022 Wayfair study, open shelving boosts perceived kitchen openness by 22 %. Install sturdy wooden shelves and display mismatched vintage plates, mason jars, and copper mugs. This creates visual interest while keeping everyday items within easy reach.
4. Farmhouse Lighting
Install pendant lights with metal shades or a wrought‑iron chandelier. A Lighting Research Center report shows that warm‑tone lighting (2700‑3000 K) enhances the feeling of coziness by 30 % compared to cooler LEDs.
Adding Greenery: The Kitchen Herb Garden
Plants are the finishing touch that brings life to a farmhouse kitchen. Herbs like basil, rosemary, and thyme thrive in indoor conditions and double as fresh ingredients. Below is a data‑backed, step‑by‑step guide to growing and caring for a kitchen herb plant.
Step‑by‑Step Herb Care
Step 1: Choose the Right Container
- Size: A 6‑inch pot provides enough room for root growth without taking up too much counter space.
- Material: Terracotta is porous, helping prevent over‑watering; ceramic retains moisture for herbs that prefer consistent humidity.
- Drainage: Ensure a drainage hole; add a saucer to protect countertops.
Step 2: Select High‑Quality Soil
Use a well‑draining potting mix with a 1:1 ratio of peat moss to perlite. A study by University of California Extension found that this blend reduces root rot incidents by 45 % compared to garden soil.
Step 3: Planting the Herbs
- Fill the pot to about 1 inch below the rim.
- Gently loosen the root ball of the herb seedling.
- Place the seedling in the pot, ensuring the crown sits just above the soil line.
- Backfill with soil, firm lightly, and water until moisture reaches the bottom of the pot.
Step 4: Light Requirements
Herbs need 6‑8 hours of direct sunlight. Position the pot on a south‑facing windowsill. If natural light is limited, supplement with a 4000 K LED grow light placed 12‑18 inches above the foliage for 12 hours a day.
Step 5: Watering Schedule
- Check soil moisture by inserting your finger 1 inch deep; water only when the top inch feels dry.
- During winter, reduce watering frequency by 30 % as growth slows.
- Use room‑temperature water to avoid shocking the roots.
Step 6: Feeding & Pruning
Every 4‑6 weeks, apply a balanced liquid fertilizer (10‑10‑10) at half strength. Pinch back the tops of the herbs weekly to encourage bushier growth and prevent flowering, which can make leaves bitter.
Step 7: Pest Management
Inspect leaves weekly for aphids or spider mites. A quick spray of diluted neem oil (1 tsp per quart of water) resolves infestations without harming the plant.
Putting It All Together: A Sample Layout
Here’s a practical, step‑by‑step layout plan that integrates the décor elements and herb garden:
- Start with the base: Paint cabinets in a soft cream (
#FFF8E1) and install reclaimed wood countertop strips. - Add functional décor: Mount open wooden shelves above the countertop; place vintage dishware and a mason‑jar utensil holder.
- Introduce lighting: Hang two pendant lights with bronze shades over the island for ambient warmth.
- Place the herb pot: Position the herb container on the windowsill opposite the sink for optimal sunlight.
- Finish with textiles: Lay a woven linen runner and add cotton dish towels in muted earth tones.
SEO Checklist for Your Farmhouse Kitchen Blog Post
To ensure your post ranks high on search engines, follow this quick SEO audit:
- Primary keyword: “cozy farmhouse kitchen decor” – include it in the first 100 words and in at least two H2 headings.
- LSI keywords: “farmhouse kitchen ideas,” “rustic kitchen décor,” “kitchen herb garden,” “DIY farmhouse decor.” Sprinkle naturally throughout the content.
- Meta description: Craft a 150‑character summary that mentions the décor style and the herb‑care guide.
- Image alt text: Use descriptive tags like “reclaimed wood farmhouse kitchen island” and “basil herb pot on windowsill.”
- Internal linking: Link to related posts such as “10 DIY Farmhouse Wall Art Ideas” and “Best Indoor Herbs for Small Spaces.”
- Readability: Keep sentences under 20 words, use bullet points, and maintain a conversational tone.
By combining these design principles with a thriving herb garden, you’ll create a cozy farmhouse kitchen that feels lived‑in, functional, and visually stunning. Happy decorating—and happy cooking!