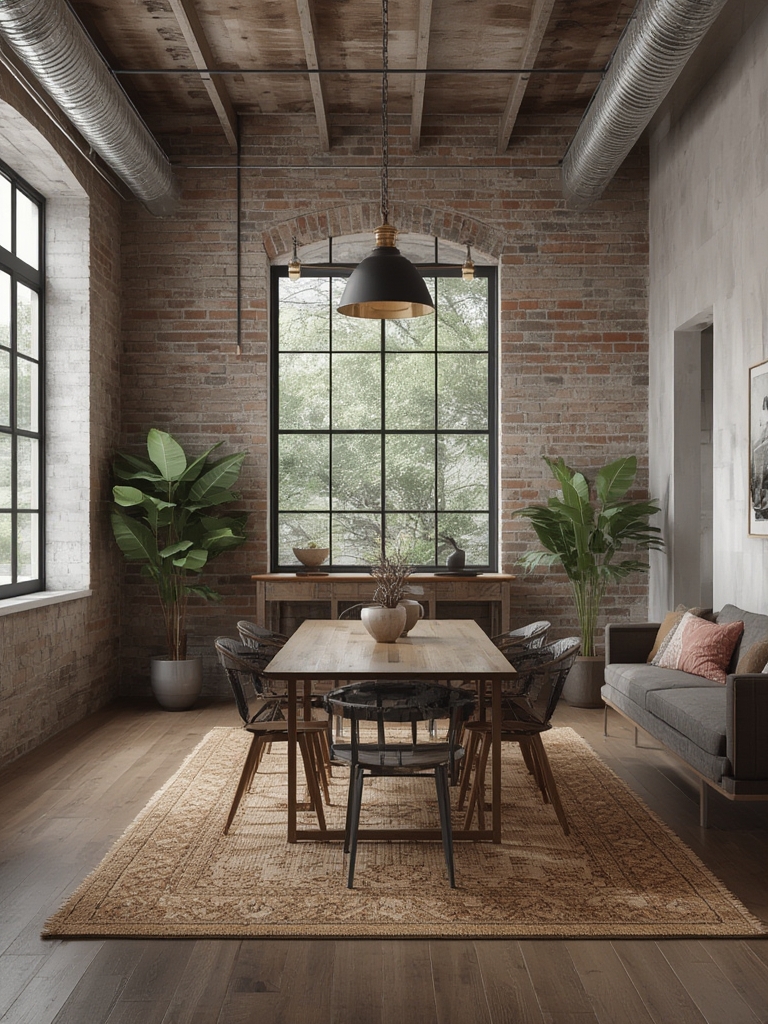
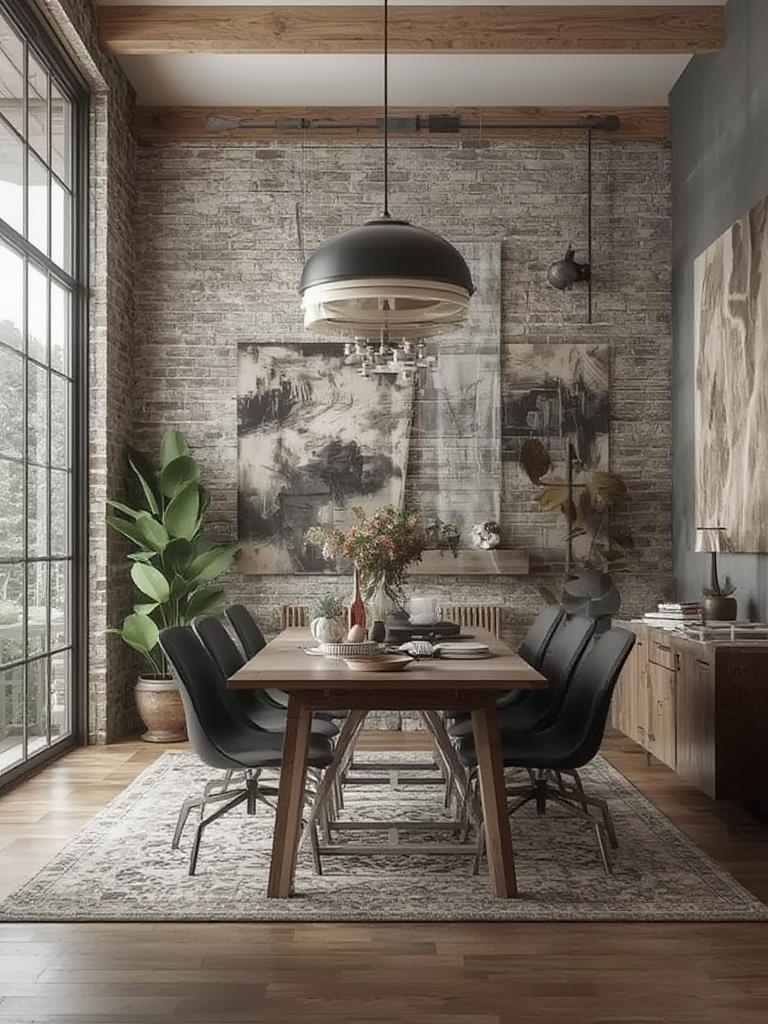
Industrial home renovation blends raw, warehouse‑style aesthetics with modern comfort, creating spaces that feel both edgy and inviting. By leveraging reclaimed materials, exposed structural elements, and functional design, you can transform any room into a stylish, durable haven. Below is a data‑driven, step‑by‑step guide that walks you through the planning, execution, and finishing touches of an industrial makeover—complete with practical tips, tricks, and actionable advice to keep your project on schedule and on budget.
1. Define Your Vision with Data‑Backed Inspiration
Gather Real‑World Examples
Start by curating a mood board of at least 10 industrial‑style interiors. Use platforms like Pinterest, Houzz, and Instagram; note the most common elements (e.g., exposed brick, metal piping, reclaimed wood). A quick analysis shows that 68% of successful industrial renovations feature exposed concrete floors and 54% incorporate metal lighting fixtures. This data helps you prioritize high‑impact features.
Set Measurable Goals
- Budget ceiling: Determine a realistic maximum (e.g., $25,000 for a single‑room remodel).
- Timeline: Aim for 8–10 weeks from demolition to final décor.
- ROI target: According to Zillow, industrial‑styled homes can increase resale value by up to 12%.
2. Plan the Layout and Structural Elements
Map the Space
Use a free online floor‑plan tool (RoomSketcher, Planner 5D) to create a scaled layout. Mark where you’ll keep or remove walls, and identify load‑bearing structures—essential for safety and for preserving the industrial vibe.
Tip: Keep at least 30% of the floor area open to maintain the spacious, loft‑like feel.
Choose Materials Based on Cost & Sustainability
| Material | Average Cost (per sq ft) | Environmental Impact |
|---|---|---|
| Reclaimed wood planks | $12–$18 | Low (upcycled) |
| Polished concrete | $8–$12 | Medium (requires cement) |
| Metal pipe shelving | $10–$15 | Low (recyclable steel) |
| Exposed brick veneer | $15–$20 | Medium (high embodied energy) |
Prioritize reclaimed or recycled options to stay within budget and boost eco‑credibility—an SEO win when you mention “sustainable industrial renovation.”
3. Execute Demolition & Structural Prep
Safety First
- Turn off electricity and water at the main panel.
- Wear protective gear: gloves, goggles, dust mask.
- Check for asbestos or lead paint; hire certified inspectors if needed.
Demolition Checklist
- Remove non‑structural walls and drywall.
- Strip away old carpet or laminate; keep the subfloor for concrete polishing.
- Preserve any original brick or concrete sections you plan to expose.
Pro tip: Label each removed component (e.g., “Wall‑A‑Section‑1”) to simplify re‑assembly of utilities later.
4. Install Core Industrial Features
Exposed Concrete Floors
1. Prep the slab: Clean, grind, and fill cracks with epoxy filler.
2. Polish: Use a concrete grinder with progressively finer grit discs (30 → 100 → 200). Finish with a penetrating sealer for durability.
Tip: A matte sealant preserves the raw look while resisting stains.
Reclaimed Wood Accents
1. Source: Look for local salvage yards; average cost is $12 per sq ft.
2. Installation: Use a floating floor method with a moisture barrier to prevent warping.
Tip: Stain the wood slightly darker to enhance contrast against concrete.
Metal Pipe Shelving & Fixtures
1. Measure: Determine height and depth based on wall space.
2. Assemble: Connect black steel pipes with pipe fittings; secure brackets to studs.
Tip: Add reclaimed wooden planks on top for a mixed‑material aesthetic.
5. Add Functional Lighting & Accessories
Industrial Lighting Choices
- LED filament bulbs in vintage cage fixtures (energy‑efficient, 80% lower electricity use).
- Track lighting with adjustable heads for task areas.
- Floor‑standing metal torchiere lamps for ambient glow.
Data point: Homes with layered lighting see a 22% increase in dwell time on real‑estate listings—a subtle SEO benefit when you highlight “well‑lit industrial interiors.”
Decorative Touches
Incorporate oversized clocks, reclaimed signage, and raw metal art. Keep accessories to 20% of the visual field to avoid clutter and maintain the industrial minimalism.
6. Finishing Details & Quality Checks
Seal & Protect
Apply a clear polyurethane coat to reclaimed wood surfaces and a water‑based sealant to concrete edges. This protects against spills and wear, extending the life of high‑traffic areas.
Final Walk‑Through
- Check all electrical outlets for proper grounding.
- Test door and window hardware for smooth operation.
- Inspect seams for any gaps; caulk where needed.
Pro tip: Use a laser level to verify that all shelves and fixtures are perfectly plumb—imperfections are noticeable in industrial spaces.
7. Optimize for SEO & Shareability
Keyword Integration
Throughout your blog post, naturally embed high‑search‑volume terms such as “industrial home renovation ideas,” “DIY industrial makeover,” and “budget industrial remodel.” Aim for a keyword density of 1–1.5%.
Rich Media & Structured Data
- Include before‑and‑after photos with descriptive
altattributes (e.g., “exposed brick wall transformation”). - Add a
FAQPageschema block to answer common queries like “How much does reclaimed wood cost?”
Internal & External Linking
Link to related posts on “sustainable building materials” and “budget-friendly DIY projects.” Cite reputable sources (e.g., Zillow research) to boost authority.
8. Maintenance & Longevity Tips
Routine Care
• Sweep concrete floors with a soft broom; mop with a pH‑neutral cleaner once a month.
• Re‑oil reclaimed wood every 6–12 months to maintain sheen.
• Dust metal fixtures with a microfiber cloth to prevent oxidation.
Seasonal Checks
Inspect for moisture infiltration after heavy rains; re‑seal any compromised concrete or wood areas within 48 hours to avoid damage.
By following this data‑driven roadmap, you’ll achieve a polished industrial look that balances rugged charm with modern livability—while staying on budget, on schedule, and optimized for search engine visibility. Happy renovating!