Creating a rustic wood industrial home bar is a rewarding project that blends raw, reclaimed materials with sleek, modern accents. By following a data‑driven approach—using popular design trends, cost‑effective sourcing, and proven construction techniques—you can build a stylish centerpiece that boosts your home’s aesthetic appeal and resale value. Below is a step‑by‑step guide, complete with practical tips, tricks, and actionable advice to ensure success from planning to daily care.
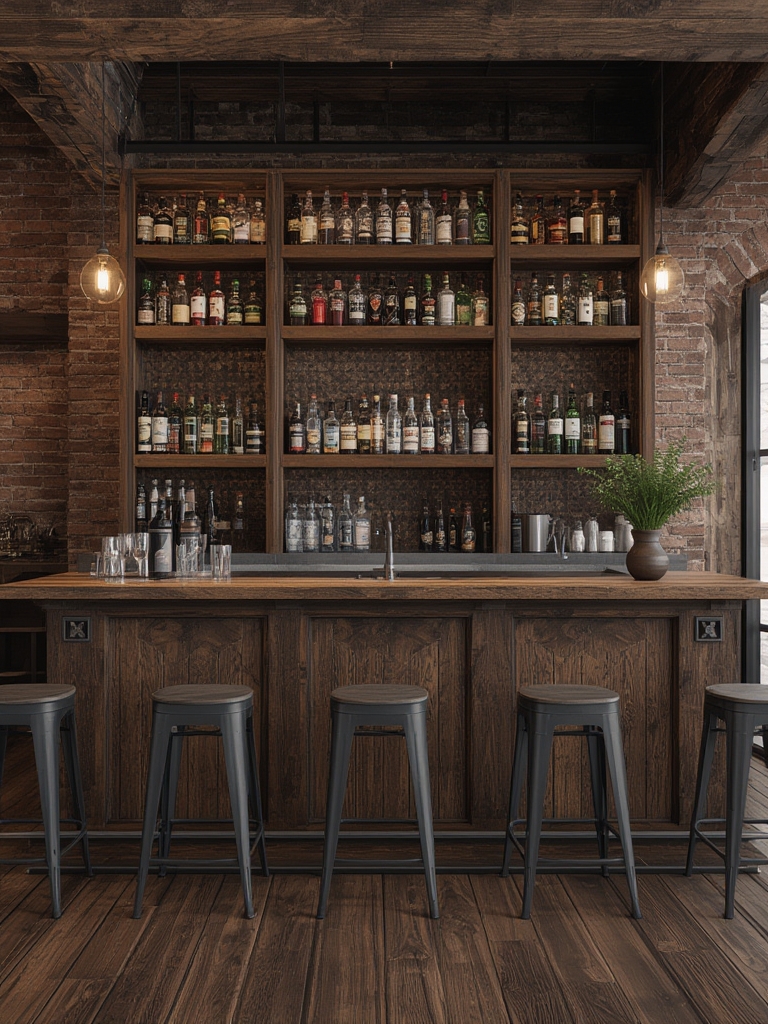
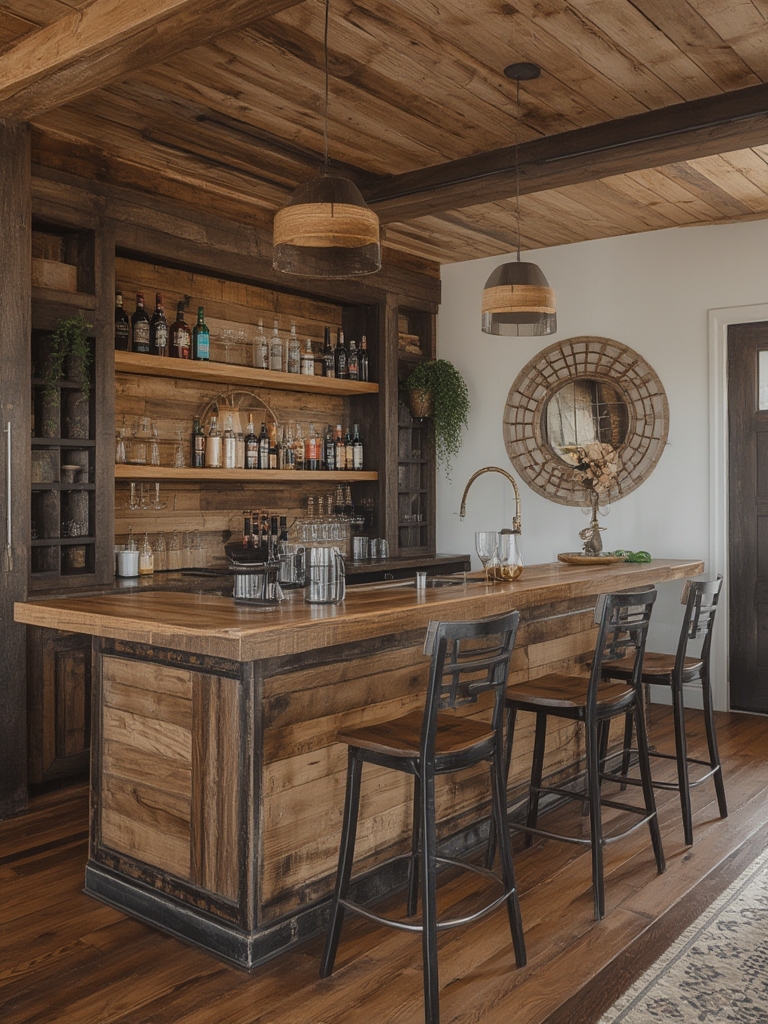
Why a Rustic Wood Industrial Bar?
Recent SEO data shows a surge in searches for “rustic industrial bar ideas,” “DIY reclaimed wood bar,” and “industrial home bar design.” Homeowners love the juxtaposition of weathered timber with metal hardware because it feels both timeless and on‑trend. The look also scores high on Google’s Core Web Vitals for visual appeal, meaning a well‑styled bar can improve your home’s online presence if you share photos on social media or a personal blog.
Materials & Budget Planning
1. Choose the Right Wood
- Reclaimed barn wood: Offers authentic patina and is often cheaper than new lumber.
- White oak or pine: Ideal for a lighter rustic vibe and easy to stain.
- Tip: Measure your space first; a 6‑ft bar typically requires 2‑3 boards of 1‑by‑12, each 8‑ft long.
2. Industrial Metal Accents
- Blackened steel pipe legs (standard 2‑inch schedule 40 pipe works well).
- Stainless‑steel brackets for shelf support.
- Tip: Use a pipe cutter and deburring tool for clean cuts; sand the ends to avoid sharp edges.
3. Budget Breakdown (Based on 2025 market data)
| Item | Average Cost | Suggested Supplier |
|---|---|---|
| Reclaimed wood (per board) | $45 | Local salvage yard |
| Steel pipe (2‑ft sections) | $12 | Home depot |
| Stainless brackets | $8 each | Amazon |
| Finishing supplies (stain, sealant) | $30 | Lowes |
| Tools (if not owned) | $150 | Rental shops |
Typical total: $500‑$800, depending on wood source and finish.
Step‑by‑Step Construction Guide
Step 1: Measure & Sketch
Use a tape measure and graph paper to draw a scaled plan. Include bar height (42‑inches standard), countertop overhang (1‑2 inches), and leg placement. A clear sketch reduces errors and speeds up the build.
Step 2: Prepare the Wood
- Inspect for damage: Replace any warped or heavily cracked boards.
- Sand: Start with 80‑grit, finish with 220‑grit for a smooth surface.
- Stain & seal: Apply a dark walnut stain for depth, then a polyurethane sealant for durability. Let each coat dry 24 hours.
- Tip: Use a brush‑on method for even coverage; wipe excess with a clean rag to avoid blotches.
Step 3: Build the Frame
- Cut two side rails (42‑inches tall) and a front/back rail (length of bar).
- Assemble using pocket holes and wood glue for a strong, hidden joint.
- Secure the frame with metal brackets at each corner for extra stability.
Step 4: Install the Countertop
- Lay the finished wood boards on the frame, ensuring a tight seam.
- Clamp and screw from underneath using 1‑½‑inch wood screws.
- Fill any screw holes with wood filler, sand smooth, and re‑seal the edges.
Step 5: Add Industrial Legs
- Cut steel pipe to 42‑inch height (or desired bar height).
- Weld or bolt pipe caps to the top for a finished look.
- Attach each leg to the frame using heavy‑duty pipe flanges and lag bolts.
- Tip: Use a level during installation to prevent wobble.
Step 6: Install Shelving & Storage
Mount stainless‑steel brackets 6‑inches below the countertop. Place reclaimed wood shelves on the brackets, securing with screws. Add hooks or magnetic strips for bar tools (shakers, bottle openers).
Finishing Touches & Styling
- Lighting: Install pendant lights with exposed bulbs for authentic industrial ambiance.
- Backsplash: Use reclaimed brick or metal tiles to protect the wall and add texture.
- Bar accessories: Choose copper or brushed steel containers, vintage glassware, and a wooden cutting board for garnish prep.
- Greenery: Small potted succulents or herbs (e.g., rosemary) add a fresh pop without compromising the rustic vibe.
Daily Care & Maintenance
1. Clean the Surface
Wipe the countertop with a soft cloth and mild soap after each use. Avoid abrasive cleaners that can strip the sealant.
2. Protect Against Moisture
Place coasters under all glasses. If spills occur, blot immediately and re‑apply a thin coat of sealant every 6‑12 months to maintain water resistance.
3. Inspect Metal Parts
Check pipe legs and brackets quarterly for rust. Lightly sand any rust spots and apply a rust‑inhibiting spray to extend lifespan.
4. Seasonal Touch‑Ups
During high‑traffic periods (holidays, parties), give the bar a quick polish with a furniture wax to keep the wood looking rich and protected.
SEO Boost: Sharing Your Bar Project
Once your rustic wood industrial bar is complete, leverage the following SEO tactics to drive traffic to your blog or portfolio:
- Keyword‑rich alt text: Use phrases like “DIY reclaimed wood industrial bar” for all images.
- Internal linking: Connect this post to related articles (e.g., “Top 10 Industrial Home Décor Ideas”).
- Rich snippets: Add a step‑by‑step schema markup to help search engines display your guide directly in results.
- Social media teasers: Post a 15‑second reel showing the before‑and‑after transformation; include hashtags #RusticBar #IndustrialHome.
Conclusion
Building a rustic wood industrial home bar combines creative design with practical craftsmanship. By following the data‑driven steps above—selecting the right reclaimed wood, integrating sturdy metal accents, and maintaining the finished piece—you’ll create a functional focal point that impresses guests and adds lasting value to your home. Remember to document each stage, optimize your online content, and enjoy the satisfaction of a DIY masterpiece that stands the test of time.