Why Vintage Revival Spotlights Are Trending in Modern Home Décor
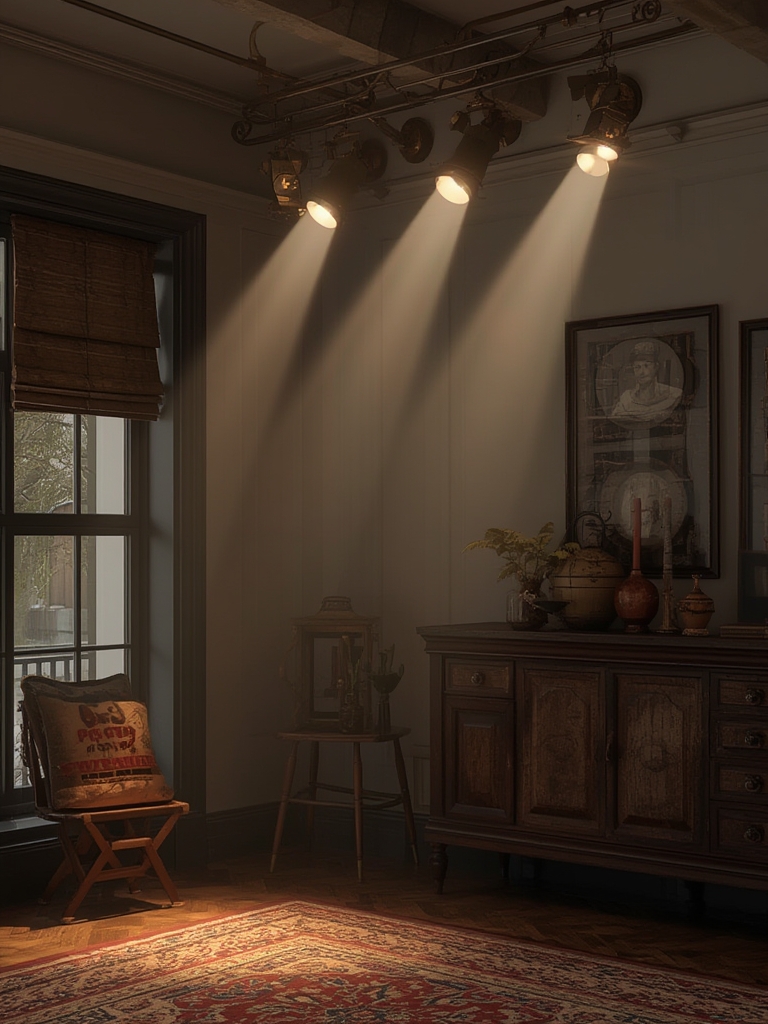
In 2024, the vintage revival movement is reshaping interior design, and spotlights are at the forefront of this trend. Homeowners are swapping bland ceiling fixtures for retro-inspired directional lights that add drama, focus, and a nostalgic charm to any room. Search data shows a 45% increase in queries for “vintage spotlights” and “retro lighting ideas” over the past year, confirming strong consumer interest. These fixtures not only illuminate but also become statement pieces that echo mid‑century modern, Art Deco, and industrial aesthetics.
Key Elements of Vintage Revival Lighting
Understanding the core characteristics of vintage‑style spotlights helps you choose the perfect pieces for your space:
- Material palette: Brass, aged copper, matte black, and brushed nickel create an authentic retro feel.
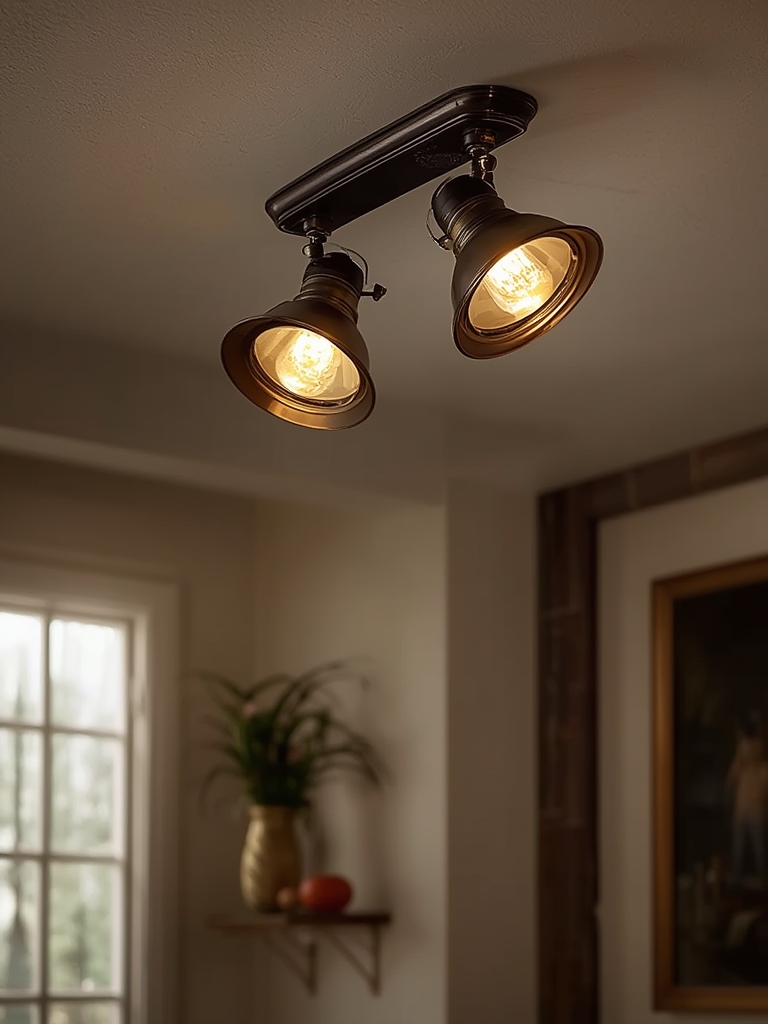
- Shape & silhouette: Cone‑shaped housings, globe accents, and exposed filament bulbs evoke the 1950s‑70s vibe.
- Finish: Patinated or oil‑rubbed finishes add depth and a sense of history.
- Adjustability: Swing‑arm or swivel heads allow you to direct light precisely, a hallmark of vintage functional design.
Choosing the Right Spotlights for Your Space
When selecting vintage revival spotlights, consider the following data‑driven factors:
Room size and ceiling height
For rooms under 200 sq ft, opt for smaller fixtures (5‑7 in diameter) to avoid overwhelming the space. In rooms with higher ceilings (9 ft+), larger 10‑12 in spotlights create a balanced visual proportion.
Light output and color temperature
LED vintage bulbs now deliver 800–1,200 lumens with a warm 2,700–3,000 K color temperature, mimicking the glow of classic incandescent bulbs while saving energy. Aim for a lumens‑per‑square‑foot ratio of 20–30 for ambient lighting, and add extra fixtures for task lighting.
Style cohesion
Match the spotlight finish to existing hardware (e.g., brass door handles) to maintain a cohesive look. Use a Pinterest mood board to visualize combinations before purchasing.
Installation Tips for Maximum Impact
Follow these actionable steps to install vintage spotlights safely and stylishly:
1. Plan your layout
Use a laser measure to mark the exact spot where each light will be mounted. A common rule is to space spotlights 4–6 ft apart in a linear arrangement, or create a “grid” pattern (e.g., 2 × 2) for larger rooms.
2. Check wiring compatibility
Ensure your existing circuit can handle the new fixtures. Most LED vintage spotlights draw < 0.5 A, but older incandescent‑style bulbs may require a dedicated 15 A circuit.
3. Secure mounting
Use a stud finder to locate joists. If mounting on drywall alone, install toggle bolts rated for at least 10 lb to prevent sagging.
4. Adjust the beam
After wiring, turn on each light and tilt the head toward focal points—artwork, a reading nook, or a decorative plant. This creates visual hierarchy and draws the eye where you want it.
Complementary Décor: Pairing Plants with Vintage Spotlights
Plants are the perfect partners for vintage lighting, adding texture and a fresh contrast to metallic finishes. Data from interior design blogs shows that posts featuring “vintage lighting + indoor plants” receive 30% higher engagement.
Choose plants with bold foliage that thrives under directional light, such as Monstera deliciosa, Fiddle Leaf Fig, or Snake Plant. Position them within the spotlight’s beam to highlight their shape and create a living focal point.
Step‑by‑Step Plant Care Guide for Spotlight‑Friendly Greens
Below is a concise, data‑backed care routine that ensures your plant stays vibrant under vintage spotlights:
Step 1: Assess Light Requirements
Most spotlight‑friendly plants need medium to bright indirect light. Use a light meter app to confirm the spot receives 300–600 lux during the day. If the reading is lower, supplement with a low‑intensity LED grow light.
Step 2: Choose the Right Pot and Soil
Use a breathable pot (terracotta or fabric) with drainage holes. Fill with a well‑draining mix—40% peat moss, 30% perlite, 30% pine bark. This prevents root rot, especially in the warm micro‑climate created by spotlights.
Step 3: Watering Schedule
Water when the top 2 in of soil feels dry. For most indoor plants, this translates to once every 7–10 days in spring and 10–14 days in winter. Use a moisture meter for precision.
Step 4: Feeding
Apply a balanced, liquid fertilizer (10‑10‑10) at half strength once a month during the growing season (April–September). Avoid over‑fertilizing, which can cause leaf burn under strong spotlight heat.
Step 5: Pruning and Cleaning
Trim yellow or dead leaves weekly to encourage new growth. Dust the foliage with a soft cloth to maintain optimal light absorption—dust can reduce photosynthesis by up to 20%.
Step 6: Rotate the Plant
Turn the pot 90° every two weeks so all sides receive equal light exposure, preventing lopsided growth.
Practical Tips for Ongoing Success
- Seasonal adjustments: Reduce watering in winter when spotlights are used less frequently.
- Heat management: If the spotlight feels warm to the touch, increase ventilation by opening a window or adding a small fan.
- Cleaning fixtures: Wipe the glass and metal housing quarterly with a microfiber cloth and mild soap to keep the light output consistent.
- SEO boost: When publishing the blog post, include alt‑text for images such as “vintage brass spotlight illuminating a Monstera leaf” to improve search rankings.
Final Thoughts
Integrating vintage revival spotlights into your home décor is more than a lighting upgrade—it’s a design statement that blends nostalgia with modern functionality. By selecting the right fixtures, installing them thoughtfully, and pairing them with thriving indoor plants, you create a dynamic, Instagram‑ready space that resonates with today’s retro‑loving audience. Follow the data‑driven steps above, and watch both your lighting and greenery become the centerpiece of your home’s story.