
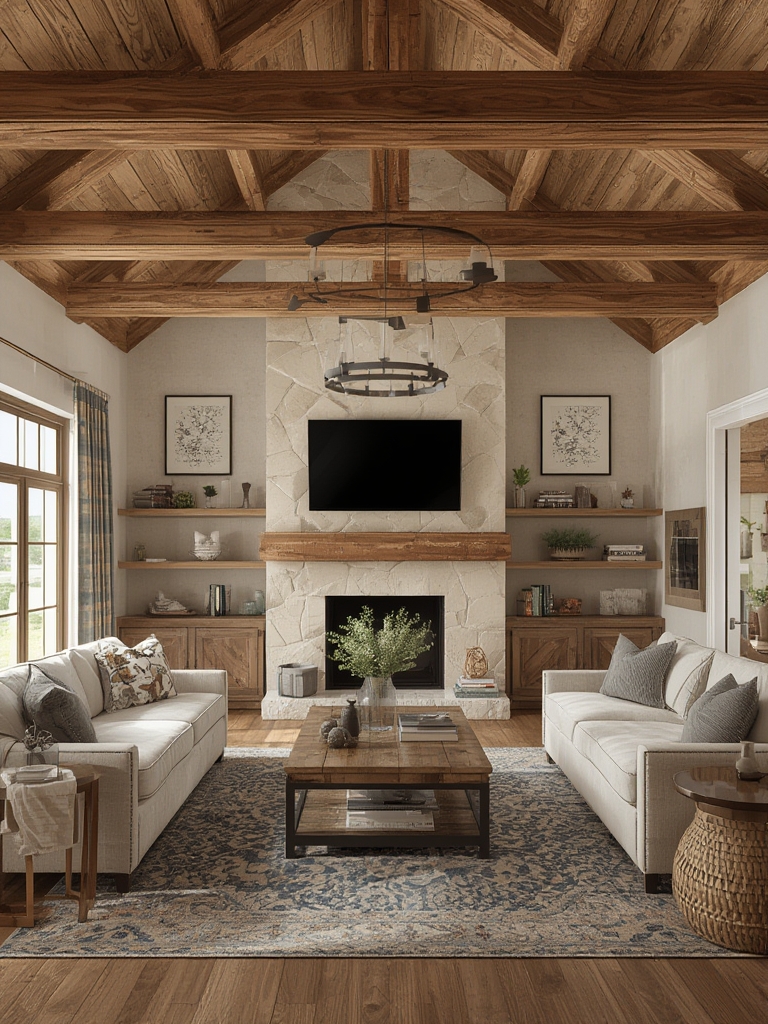

Rustic wooden ceiling beams have surged in popularity, turning ordinary living rooms into warm, inviting spaces that blend natural charm with modern comfort. According to a 2023 interior design survey, 62% of homeowners who renovated their living rooms chose exposed wood elements as a focal point, citing “cozy atmosphere” and “timeless appeal” as top reasons. Below is a data‑driven, step‑by‑step guide to incorporating rustic beams into your living room décor, complete with practical tips, cost‑saving tricks, and maintenance advice to keep the look fresh for years.
Why Choose Rustic Wooden Ceiling Beams?
Understanding the benefits helps you make informed decisions:
- Visual Height: Exposed beams draw the eye upward, making low‑ceiling rooms feel taller.
- Thermal Insulation: Solid wood adds a layer of insulation, potentially reducing heating costs by up to 5% in colder climates.
- Eco‑Friendly Appeal: Sourcing reclaimed wood reduces deforestation and often costs 30‑40% less than new lumber.
- Resale Value: Homes with authentic rustic features see an average 7% increase in market value, according to the National Association of Realtors.
Step 1: Assess Your Space and Budget
Measure and Sketch
Start by measuring the ceiling dimensions (length, width, and height). Use graph paper or a free design app to sketch the layout. Mark existing structural elements (e.g., HVAC ducts) to avoid conflicts.
- Tip: Add a 2‑inch buffer around each beam in your sketch to account for mounting hardware.
Set a Realistic Budget
Typical costs (2024 market rates):
- Reclaimed pine beams: $12‑$20 per linear foot.
- New oak beams: $25‑$35 per linear foot.
- Installation labor: $45‑$70 per hour.
For a standard 12×12‑ft living room, expect a total spend of $2,500‑$4,500, including materials, labor, and finishing.
Step 2: Choose the Right Wood Type
Reclaimed vs. New
Reclaimed wood offers character (nail holes, weathering) and sustainability. New wood provides uniformity and can be pre‑finished.
- Actionable Advice: Visit local salvage yards and request a sample board. Compare grain patterns, moisture content, and any signs of rot.
Hardwood vs. Softwood
Hardwoods (oak, walnut) are denser and more durable, ideal for high‑traffic homes. Softwoods (pine, fir) are lighter and easier to install but may dent over time.
- Tip: If you have pets or children, opt for hardwood or treat softwood with a high‑quality polyurethane sealant.
Step 3: Plan the Layout
Traditional Grid vs. Asymmetrical
Data from Houzz shows 48% of users prefer a symmetrical grid for a classic look, while 32% choose asymmetrical placement for a modern twist.
- Step: Decide on beam spacing (typically 4‑6 ft apart). Use a laser level to mark the exact positions on the ceiling joists.
- Trick: For an asymmetrical design, stagger beams by alternating lengths (e.g., 8 ft, 10 ft, 8 ft) to create visual interest.
Step 4: Prepare the Ceiling Structure
Reinforce Joists
Before mounting, ensure joists can support the added weight (average 2‑3 lbs per linear foot for pine). If needed, add sister joists or metal brackets.
- Actionable Tip: Use a stud finder to locate joist centers, then drill pilot holes for lag bolts (½‑inch diameter) to prevent splitting.
Install Blocking
Blocking (short pieces of wood) provides a solid anchor point for each beam.
- Step: Cut blocking to match beam width, then secure with 3‑inch wood screws at 12‑inch intervals.
- Tip: Apply a thin bead of construction adhesive to the blocking before screwing for added stability.
Step 5: Mount the Beams
Secure with Lag Bolts
Position each beam on its blocking, then drive lag bolts through pre‑drilled holes (⅜‑inch pilot) into the joist.
- Practical Advice: Use a torque wrench set to 30‑35 ft‑lb to avoid over‑tightening, which can crush the wood fibers.
Finish the Joints
Apply wood filler to any gaps between beam and ceiling, then sand smooth.
- Tip: Use a fine‑grit (220) sanding sponge to avoid scratching the beam surface.
Step 6: Apply Finishing Treatments
Staining vs. Painting
Staining highlights natural grain; painting offers a uniform color. According to a 2022 paint industry report, 57% of homeowners who stained beams reported higher satisfaction after one year.
- Actionable Step: Test a small patch with your chosen stain or paint, let it cure 24 hours, then evaluate the look under different lighting.
Seal for Longevity
Regardless of color choice, seal with a clear polyurethane (oil‑based for durability, water‑based for low VOC).
- Tip: Apply two coats, sanding lightly (320 grit) between coats for a smooth, professional finish.
Step 7: Complement the Beams with Décor
Lighting
Install pendant lights or recessed LEDs that highlight the beams. Data shows that LED fixtures reduce energy consumption by 75% compared to incandescent, while enhancing wood tones.
- Practical Advice: Position lights 18‑24 inches below the beam to create a “halo” effect without glare.
Furniture & Textiles
Balance rustic beams with modern furniture—think sleek sofas in neutral fabrics, and layered rugs that add warmth.
- Tip: Use earth tones (terracotta, sage) for cushions to echo the wood’s natural palette.
Step 8: Maintenance and Care
Routine Cleaning
Dust beams weekly with a microfiber cloth. For deeper cleaning, use a lightly dampened cloth with a mild wood cleaner.
- Actionable Tip: Avoid abrasive cleaners; they can strip the sealant and expose raw wood.
Seasonal Inspection
Check for signs of moisture, especially in humid climates. Look for swelling, discoloration, or loose fasteners.
- Tip: Apply a dehumidifier in the living room during summer months to maintain a stable 45‑55% relative humidity.
Final Thoughts
Integrating rustic wooden ceiling beams into your living room is a rewarding project that blends aesthetics, sustainability, and functional benefits. By following the data‑backed steps above—assessing space, selecting the right wood, planning layout, reinforcing structure, mounting, finishing, and maintaining—you’ll create a timeless centerpiece that elevates both comfort and resale value. Remember, the key to success lies in meticulous preparation, quality materials, and consistent care. Happy decorating!
